Kulinary Adventures of Kath

Food Photography, Recipes & Baking
  • home
  • About
  • Work with Kath
  • Shop
  • Blog
    • The Blog
    • Recipe Archive
  • Newsletter
  • Contact
  • home
  • About
  • Work with Kath
  • Shop
    • The Blog
    • Recipe Archive
  • Newsletter
  • Contact
Raspberry Pistachio Rose Cake (23 of 25).jpg

The Blog

Recipes and Food Photography by Kath Vincent.

  • The Blog
  • Recipe Archive
  • All
  • Biscuits/Cookies
  • Breads Etc.
  • Breakfast
  • Cakes & Slices
  • Confectionary
  • Drinks
  • Events
  • Food Photography Tips
  • From The Mailing List
  • Heirloom Recipes
  • Holidays
  • Ice Cream
  • Jams Preserves & Spreads
  • Muffins
  • Off the Shelf
  • Other Desserts
  • Savoury Dishes/Meals
  • Scones
  • Tarts & Pastry
  • Travel
Rose & Vanilla Bean Ice Cream

Rose & Vanilla Bean Ice Cream

Rose & Vanilla Bean Ice Creams (Egg Free)

Kath July 17, 2018

This is one of those super Summery recipes that I just can’t get enough of. Having said that, yes I know I am posting this while we are in the middle of Winter here in Australia, and feeling particularly cold if I do say so myself. 

I first made these late last year, when we were at the beginning of what felt like one of the hottest and longest Summers ever. I was inspired by a milkshake I used to order at one of my favourite city haunts, The Tea Salon. Rose and vanilla is a winning combination for me, and in the Summer months it was always nice to have a good alternative to a hot tea. I met up with friends there often, it really became our go to place. 

Located in the Sydney City Westfield it was easy to get to and ticked the boxes in terms of the menu, and the pretty pink decor didn’t hurt either! The Tea Salon closed down a few months ago, much to my friends and my dismay. It felt like the end of an era, and I’m not quite sure what will replace our regular city haunt yet. 

View fullsize Rose & Vanilla Bean Milkshake at The Tea Salon
View fullsize Scone at The Tea Salon

Until we find somewhere just as good, I will have to be content with this recipe being the legacy of our many catch ups over the years at The Tea Salon. And while now doesn’t feel like the opportune time to be posting a recipe for ice cream for most of us here in Australia, it is definitely the perfect time for everyone in the Northern Hemisphere who seem to be enjoying endless Summer days. 

Not being a warm weather person, I am certainly not jealous of the weather everyone up there is having. I am however loving all the beautiful Instagram posts with all the Summer blooms, beautiful fashions, and fun outdoor activities. Summer in the UK in particular, through the lens of Instagram, looks utterly delightful compared to the hot and humid, sometimes almost 40 degrees days we can have here in Sydney. 

I can definitely see myself enjoying some of this ice cream again later in the year when the weather warms up, and maybe reminisce over some of the good times this recipe was inspired by. But for now I’ll just leave this recipe here till then, and continue to enjoy my warming cups of tea, soups and multitudes of blankets. 

Rose & Vanilla Bean Ice Creams

Rose & Vanilla Bean Ice Creams

Rose & Vanilla Bean Ice Creams

Rose & Vanilla Bean Ice Creams

Rose & Vanilla Bean Ice Creams (Egg Free)

Ingredients: 

165ml milk 

6 tbsp white sugar

250ml pouring cream 

1 vanilla bean seeds scraped or 1 tsp vanilla bean paste

2 tbsp rosewater (or to taste) 

Dried rose petals chopped, optional


Method: 

Whisk the milk and sugar together until the sugar has dissolved and the milk has become frothy. Then add the cream, the vanilla, and rosewater. Whisk until combined and the mixture has thickened a little. 

Transfer mixture into the bowl of an ice cream machine, and process according to machine instructions. I find the churning process takes about 10 minutes (weather depending), and is ready once the ice cream has thickened, slightly frozen and is clinging to the paddle of the ice cream machine. 

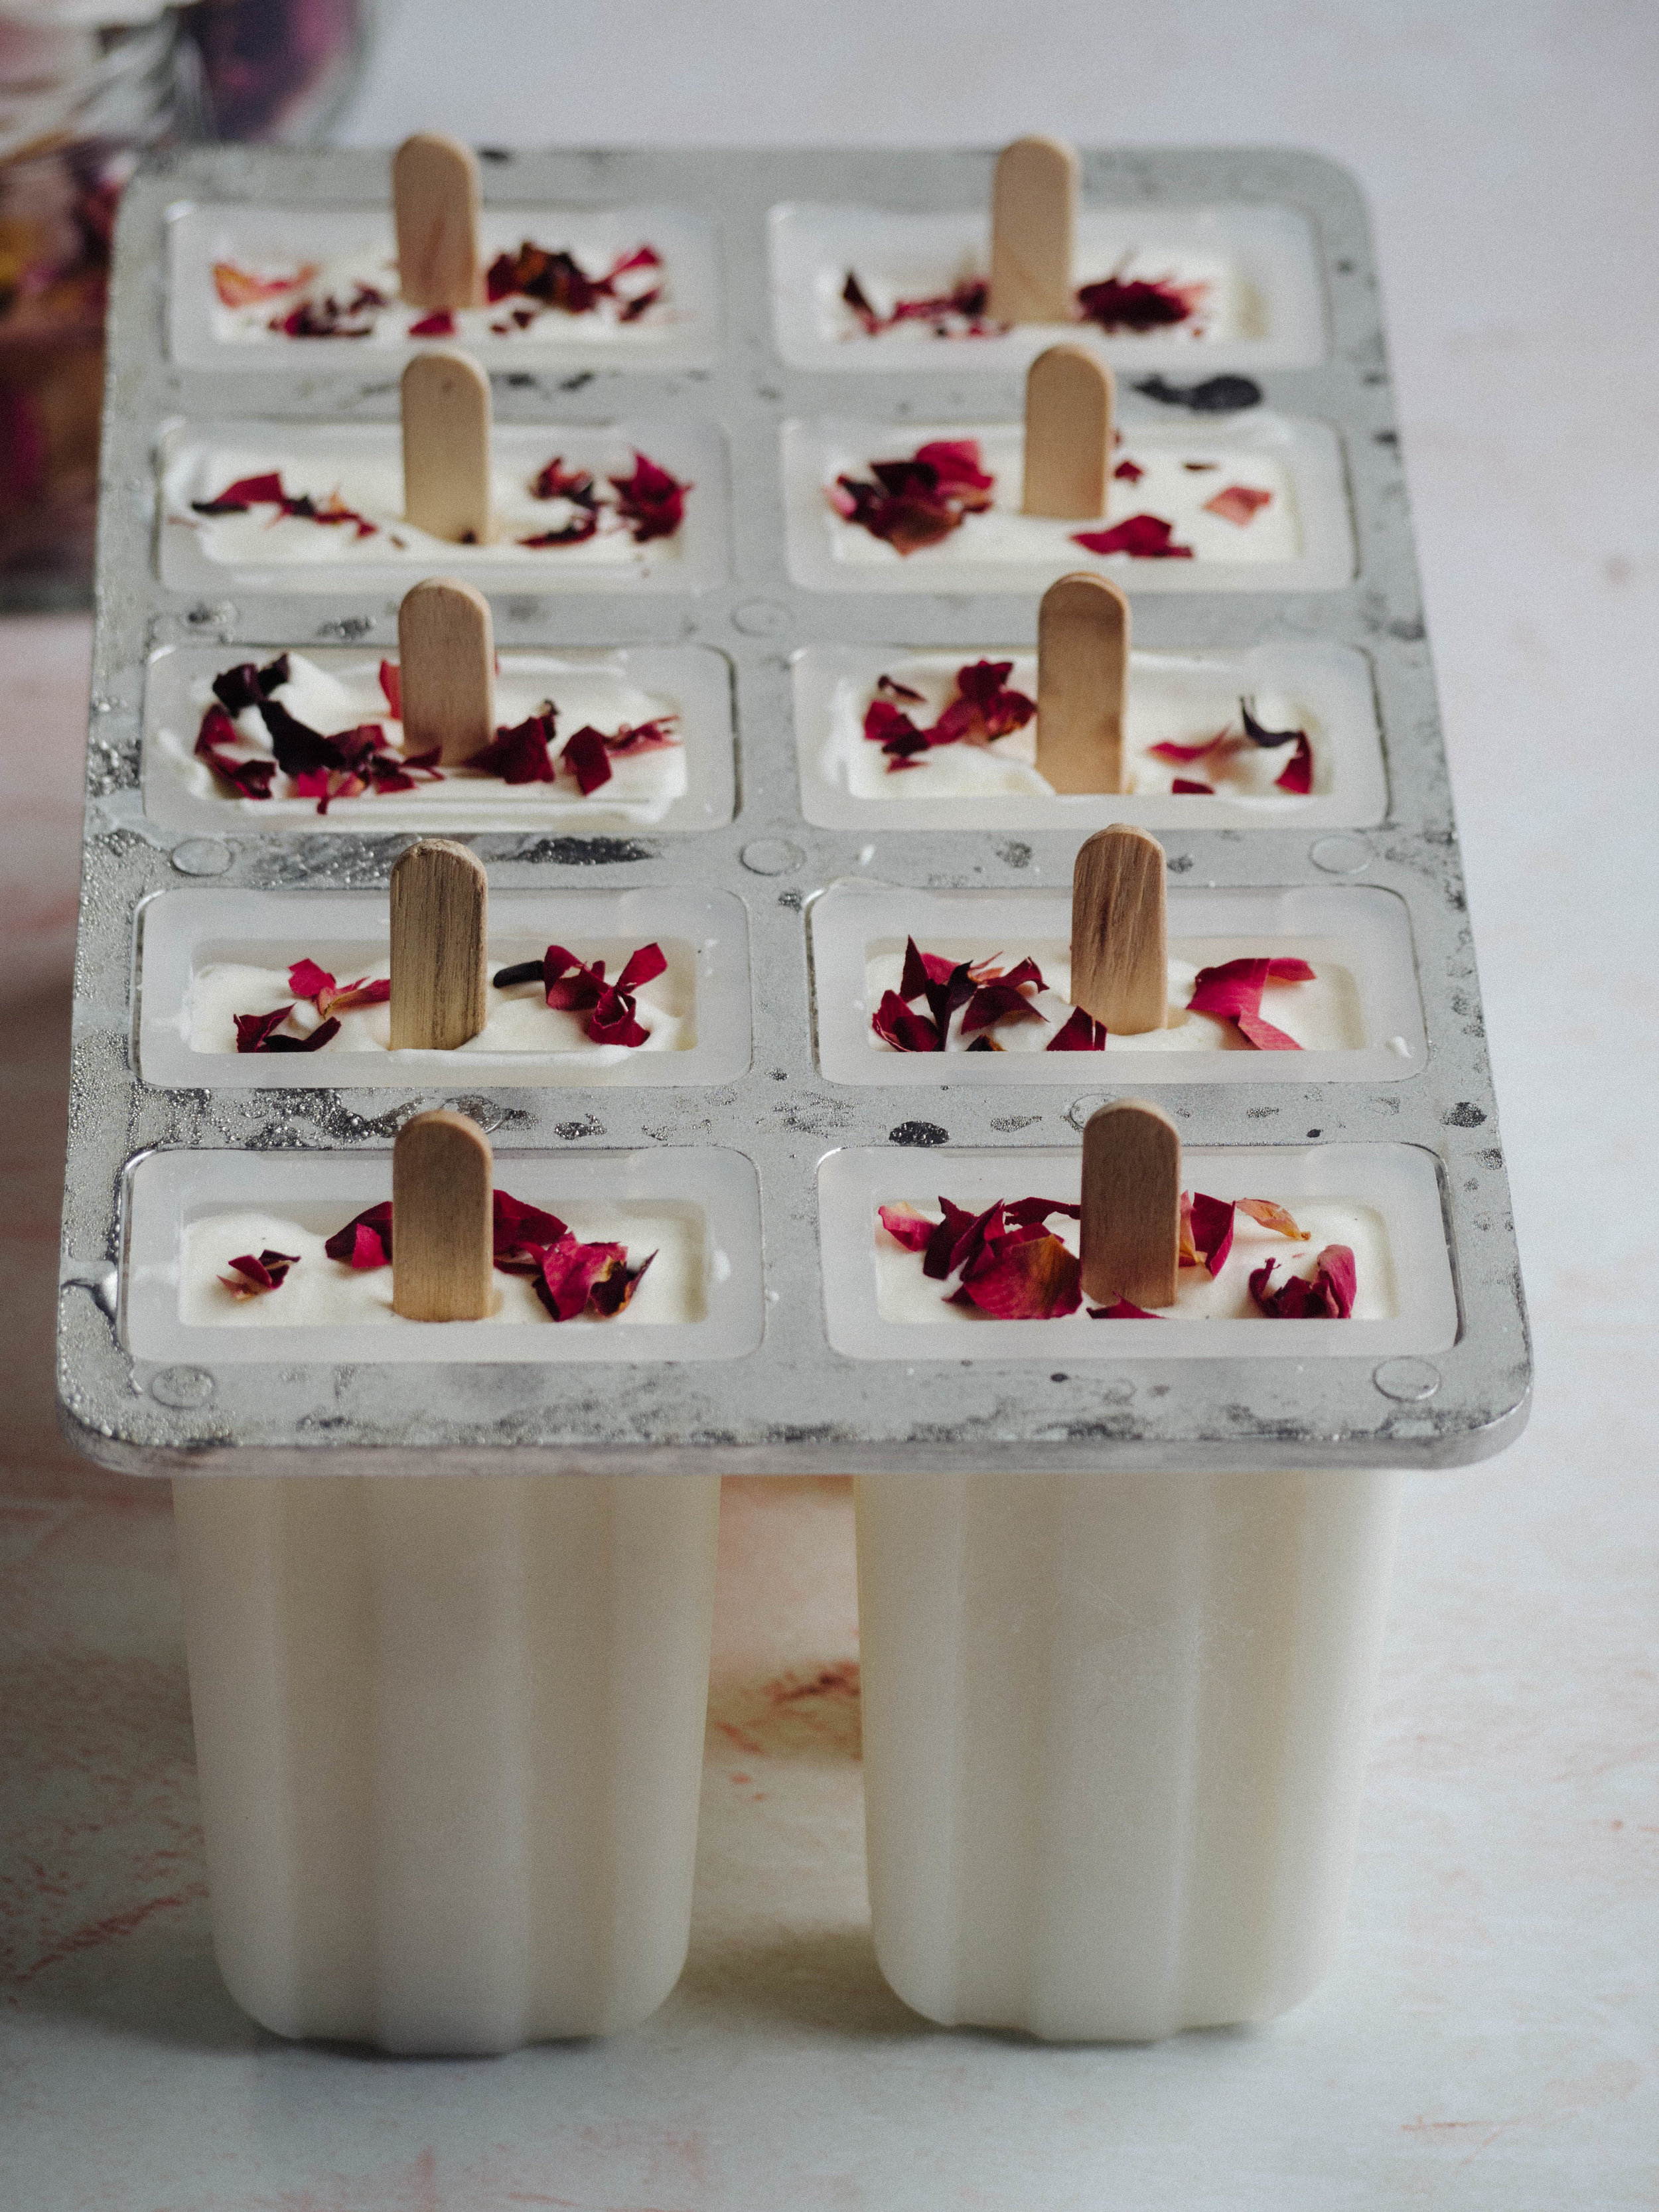
Once ready, transfer to a large piping bag and pipe into ice cream mould. Sprinkle some of the dried rose petals over the top, insert food safe wooden sticks into the centre of each one and place in the freezer. To keep the sticks in place I often cover the whole mould with a couple of layers of plastic wrap. Alternatively, transfer ice cream to a freezer safe container (at least 1L capacity) and freeze overnight. 

If making the individual ice creams, carefully remove them from the mould when ready to eat, the ice cream will melt quite quickly in the warmer Summer months! I found it easier to remove all of them from the mould once they were properly frozen and individually wrap them in plastic wrap to store in the freezer. 

Makes 10 individual ice creams or about 1L of ice cream. 

Rose & Vanilla Bean Ice Creams

Rose & Vanilla Bean Ice Creams

Reference: ‘Lomelino’s Ice Cream’ by Linda Lomelino (Roost Books, 2015), p.13

Rose & Vanilla Bean Ice Creams

Rose & Vanilla Bean Ice Creams

Dried Rose Petals

Dried Rose Petals

For more recipes showcasing the best of rose, check out my eBook Baking with Rose by clicking the link below!

get your ebook!
In Other Desserts, Ice Cream Tags Ice Cream, Rose, Rose Petals, Vanilla, The Tea Salon
Comment
Caramel Ice Cream (Egg Free)

Caramel Ice Cream (Egg Free)

How to Make Homemade Caramel Ice Cream (Egg Free)

Kath November 17, 2017

Since I have been using this simple ice cream recipe, there seems to be no end to the number of adaptations I can make with it. This caramel version came about when I was making a Carrot Cake for my Dad’s birthday in August, the recipe coming from the blog My Name is Yeh. 

The carrot cake called for making caramel. I can’t say I make caramel that often, it’s one of those things I feel can go wrong so easily. But after making it for this cake, and finding it went much more smoothly than I remember, I decided to make some more and add it to my favourite ice cream recipe to serve with the cake. 

I have made it again since then, and I am so enjoying making (and eating) this new adaptation of my favourite ice cream recipe. And with the holiday season coming up soon, I am thinking this may need to be on our Christmas menu. 

Speaking of Christmas, I am currently working on a festive baking e-book, filled with our family favourites for the holiday season. Anyone who is already a subscriber to my email list will receive a copy once the e-book is released - so if you aren’t a subscriber sign up now so you don’t miss out!

Caramel Ice Cream (Egg Free)

Caramel Ice Cream (Egg Free)

Caramel Ice Cream (Egg Free)

Caramel Ice Cream (Egg Free)

Caramel Ice Cream (Egg Free)

Caramel Ice Cream (Egg Free)

Caramel Ice Cream (Egg Free)

Ingredients for the Caramel: 

75g white sugar

1 tbsp water

65g heavy/double cream

55g unsalted butter cubed, at room temperature


Ingredients for the Ice Cream: 

165ml milk 

6 tbsp white sugar

250ml pouring cream 

1 tsp vanilla extract 


Method: 

To make the caramel, place the sugar into a small saucepan, and stir in the water. Cook over high heat, stirring to dissolve the sugar until it starts to bubble. Then stop stirring (and don’t stir again or the caramel will crystallise), and leave to cook for a further couple of minutes or until the caramel has turned amber in colour. If the caramel isn’t cooking evenly, swirl the pan to encourage the caramel to colour evenly. 

Reduce the heat to low, and add the cream. Stir until the cream has combined with the caramel. Continue to stir and add the butter little by little so each piece has time to melt before the next is added. 

Once all the butter has been added and is well combined, remove the caramel from the heat and allow to cool. 

Ensure the caramel has cooled right down before using to make the ice cream. Alternatively, make the caramel the day before, store in the fridge and bring down to room temperature before using to make the ice cream. 

To make the ice cream, whisk the milk and sugar together until the sugar has dissolved and the milk has become frothy. Then add the cream, the vanilla, and the caramel. Whisk until combined and the mixture has thickened a little. 

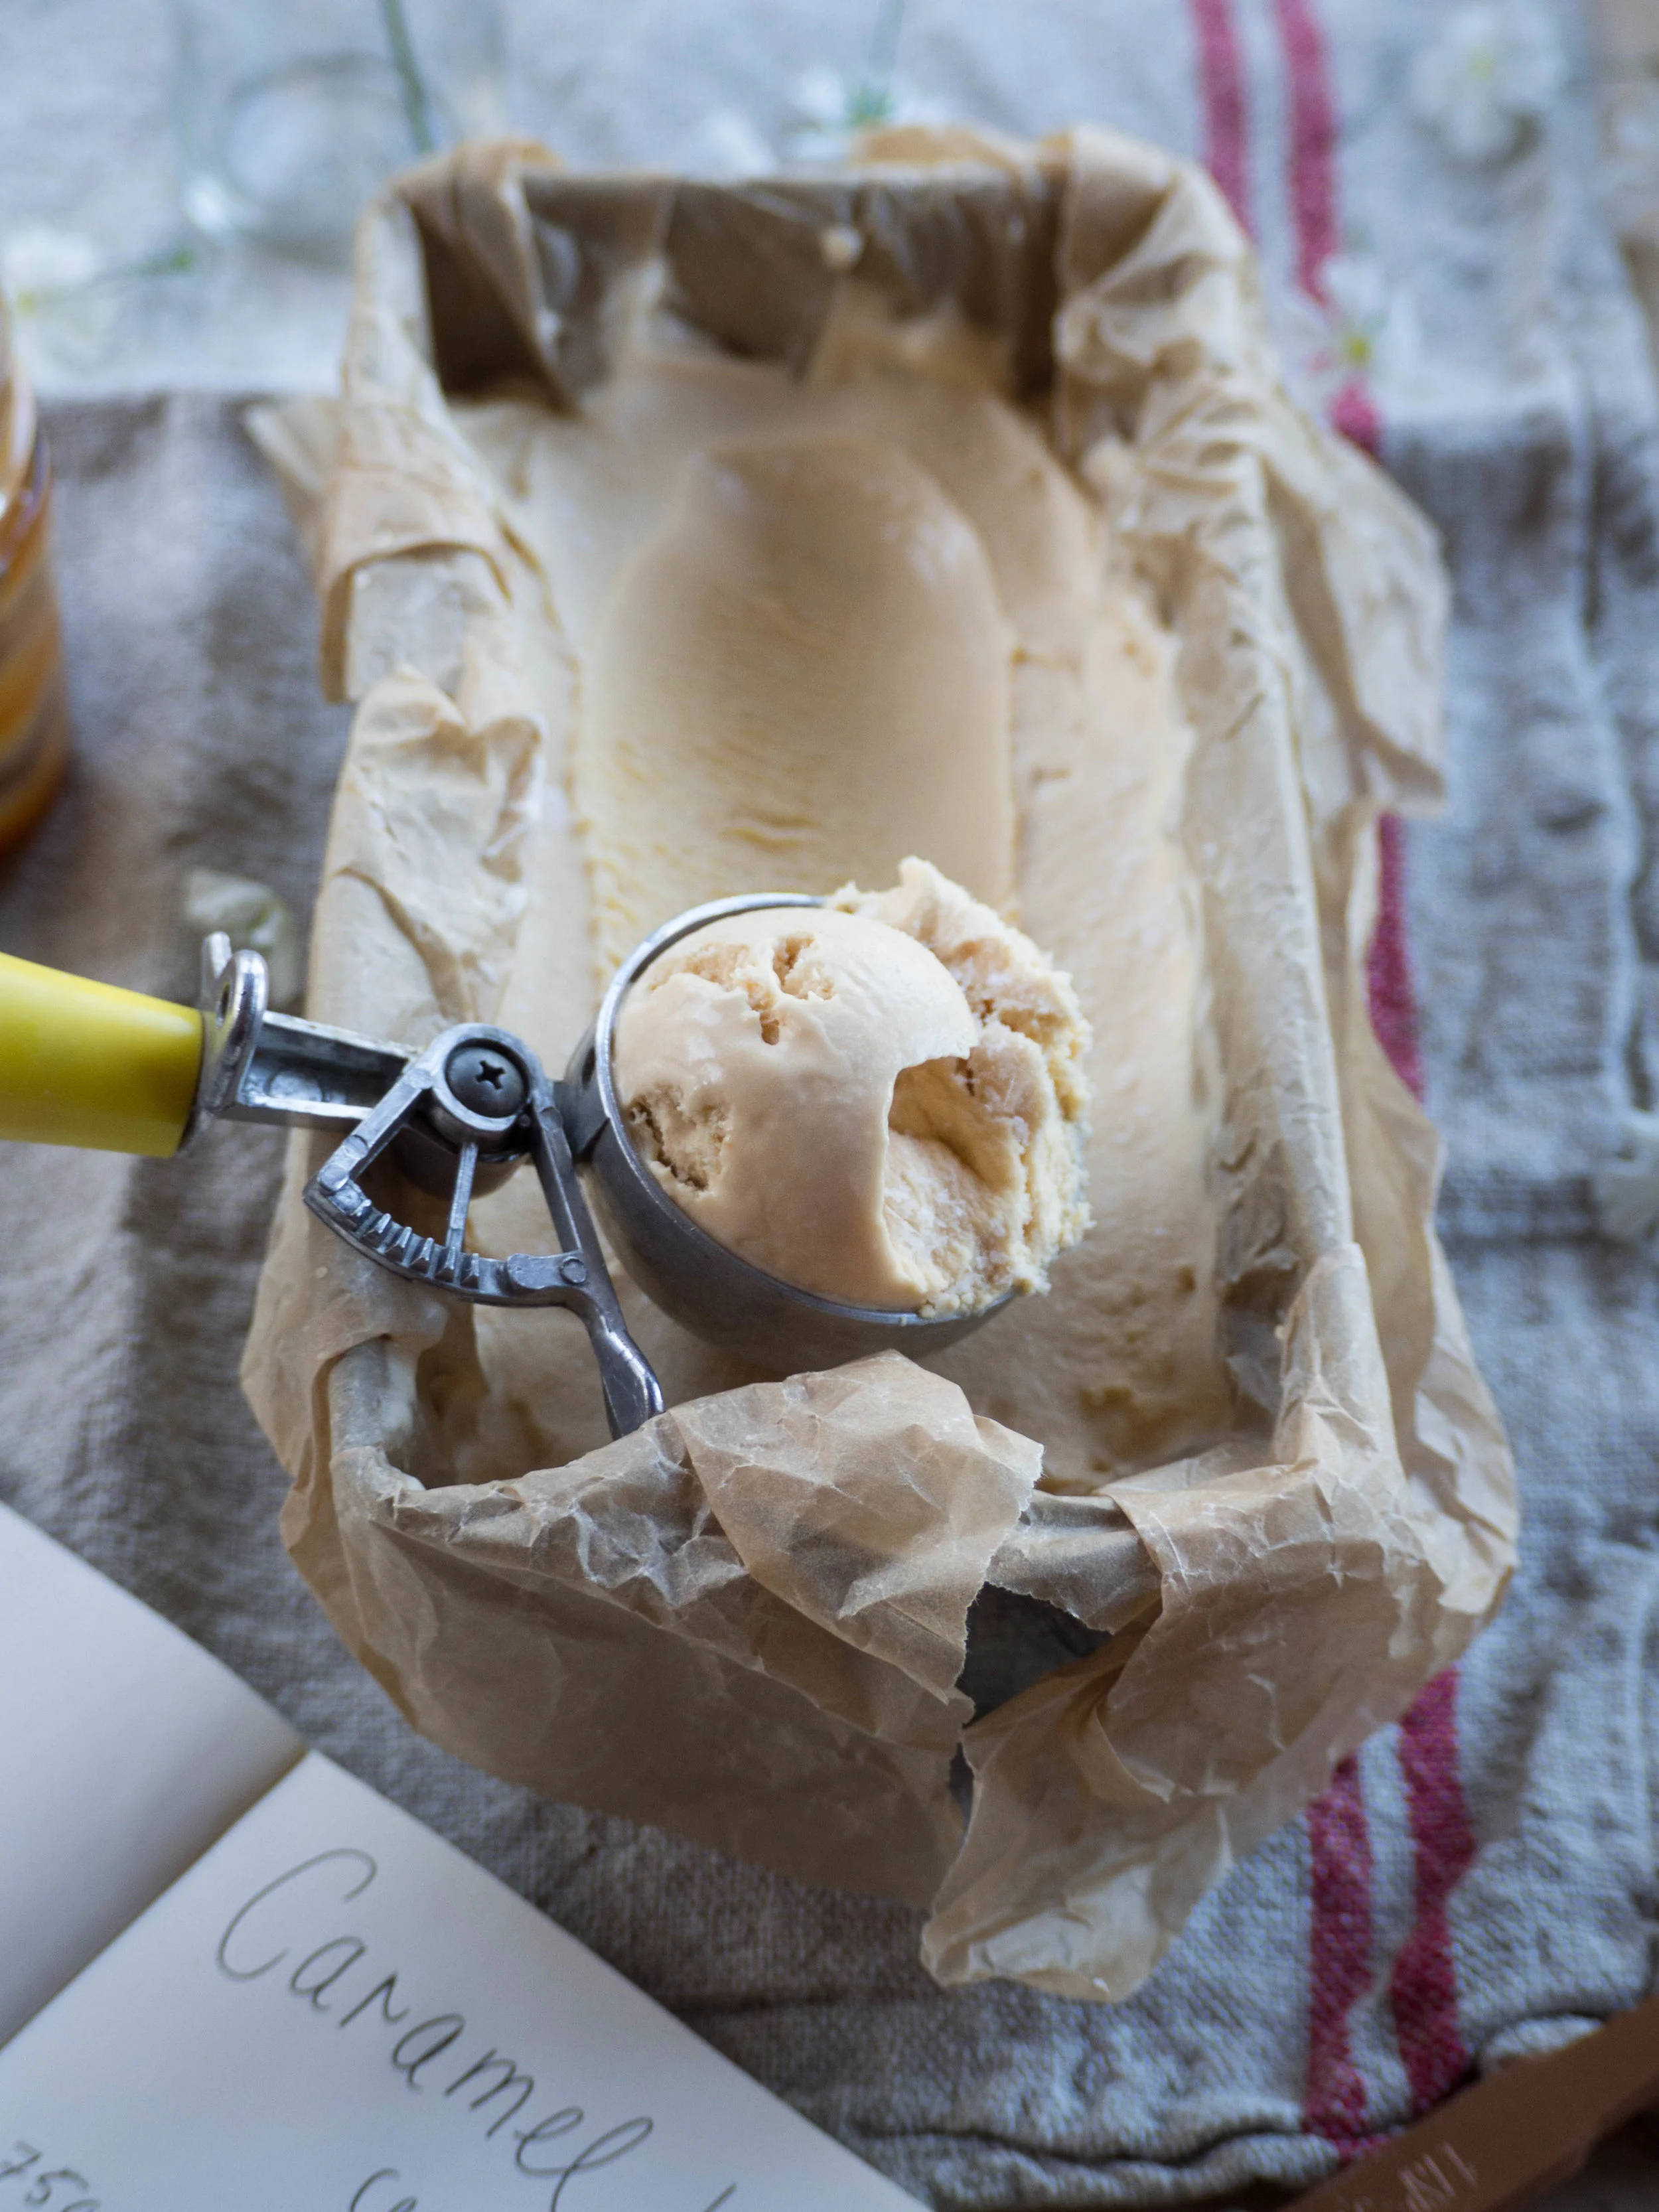
Transfer mixture into the bowl of an ice cream machine, and process according to machine instructions. I found the churning process took about 10-15 minutes. When ready, the ice cream should have thickened, be softly frozen like a soft serve ice cream, and be clinging to the paddle of the ice cream machine. When ready, transfer ice cream into a freezer safe container (at least 1L capacity) and freeze overnight. 

Caramel Ice Cream (Egg Free)

Caramel Ice Cream (Egg Free)

Caramel Ice Cream (Egg Free)

Caramel Ice Cream (Egg Free)

Reference: ‘Lomelino’s Ice Cream’ by Linda Lomelino (Roost Books, 2015), p.13; Carrot Cake with Hawaij and Tahini Caramel by My Name Is Yeh.

Caramel Ice Cream (Egg Free)

Caramel Ice Cream (Egg Free)

Caramel Ice Cream (Egg Free)

Caramel Ice Cream (Egg Free)

In Other Desserts, Ice Cream Tags Ice Cream, Caramel, My Name is Yeh, E-Book
Comment
Duck Egg Pavlova with Fresh Honeycomb

Duck Egg Pavlova with Fresh Honeycomb

Duck Egg Pavlova with Fresh Honeycomb

Kath October 13, 2017

As you may have noticed from the number of times I have posted a recipe for Pavlova on this blog, I love Pavlova! It was my favourite thing my Grandma made, and I seem to be unable to stop coming up with new adaptations to it. 

After making a Duck Egg Sponge a little while ago, I knew that next time I was able to find duck eggs I would try and bake something different. So when I finally found them again, I decided to make a duck egg Pavlova! A quick Google told me that duck eggs make great Pavlovas so I was keen to try it out. The flavours for this Pavlova are inspired by the honeyed cream from the Duck Egg Sponge I made. Adding honey to whipped cream is just about the most simple thing to do, but it tastes so good! I also love fresh honeycomb, so I couldn’t resist using some to decorate the Pavlova. 

I buy my honeycomb from a farm stand in the north western suburbs of Sydney, and it is super fresh, and not too expensive ($15 for 500g). Fresh honeycomb is the purest form of honey you can eat as it has not gone through any filtering processes. The comb of the honey is fine to eat, and actually contains many beneficial properties. The honey this particular farm stand sells is amazing as well, and is also raw so all the good things are left in the honey rather than being striped out. 

I have found these types of honey’s have a more complex and interesting flavour than the honey sold at supermarkets, and buying it straight from the producer means you can buy it in larger quantities and at a better price than honey’s sold at gourmet food stores. Depending on where you live, you might even be able to find fresh duck eggs at farm stands or farmers markets, its always worth keeping an eye out!

Duck Egg Pavlova with Fresh Honeycomb

Duck Egg Pavlova with Fresh Honeycomb

Duck Egg Pavlova with Fresh Honeycomb 

Duck Egg Pavlova with Fresh Honeycomb 

Duck Egg Pavlova with Fresh Honeycomb

Duck Egg Pavlova with Fresh Honeycomb

Duck Egg Pavlova with Fresh Honeycomb

Duck Egg Pavlova with Fresh Honeycomb

Duck Egg Pavlova with Fresh Honeycomb

Ingredients: 

6 duck egg whites

375g caster sugar

1.5 tsp white vinegar 

1.5 tsp vanilla bean paste 

30g cornflour 


To decorate: 

300ml pouring cream

90ml honey

fresh honeycomb

dried edible lavender

edible flowers, to decorate, optional


Method: 

Pre-heat oven to 200 degrees Celsius. Line a large baking tray with baking paper.

Separate the duck eggs adding the whites to the bowl of a stand mixer. Duck egg shells are tougher than chicken eggs, and take a little more effort to crack, and I have found in the process the shells won’t crack ‘cleanly’. I suggest cracking each over a glass then separating the yolk and the whites over another glass or small bowl so you keep as many shell fragments contained and away from the pavlova mixture as possible! 

Beat the egg whites for 5-6 minutes, whilst gradually adding the sugar. Add the vinegar and vanilla and beat until the mixture is stiff, glossy and holds its peak (for an example of what this looks like see this video on my Facebook page).

Sift cornflour over the mixture, and gently fold to combine. 

Use a little of the mixture to help keep the baking paper in place. Spread the mixture into a rectangle, approximately 20 x 35 cm (this will depend on the size of your tray). If you want a pavlova with a more marshmallowy centre, make the rectangle smaller than 20 x 35 cm, so it will be thicker rather than wide. Try to keep the edges a little higher than the middle so any filling can sit comfortably later. 

Turn the oven down to 125 degrees Celsius, and cook undisturbed for 1.5 hours. 

After 1.5 hours, turn the oven off and leave the pavlova to cool completely in the oven (or overnight). 

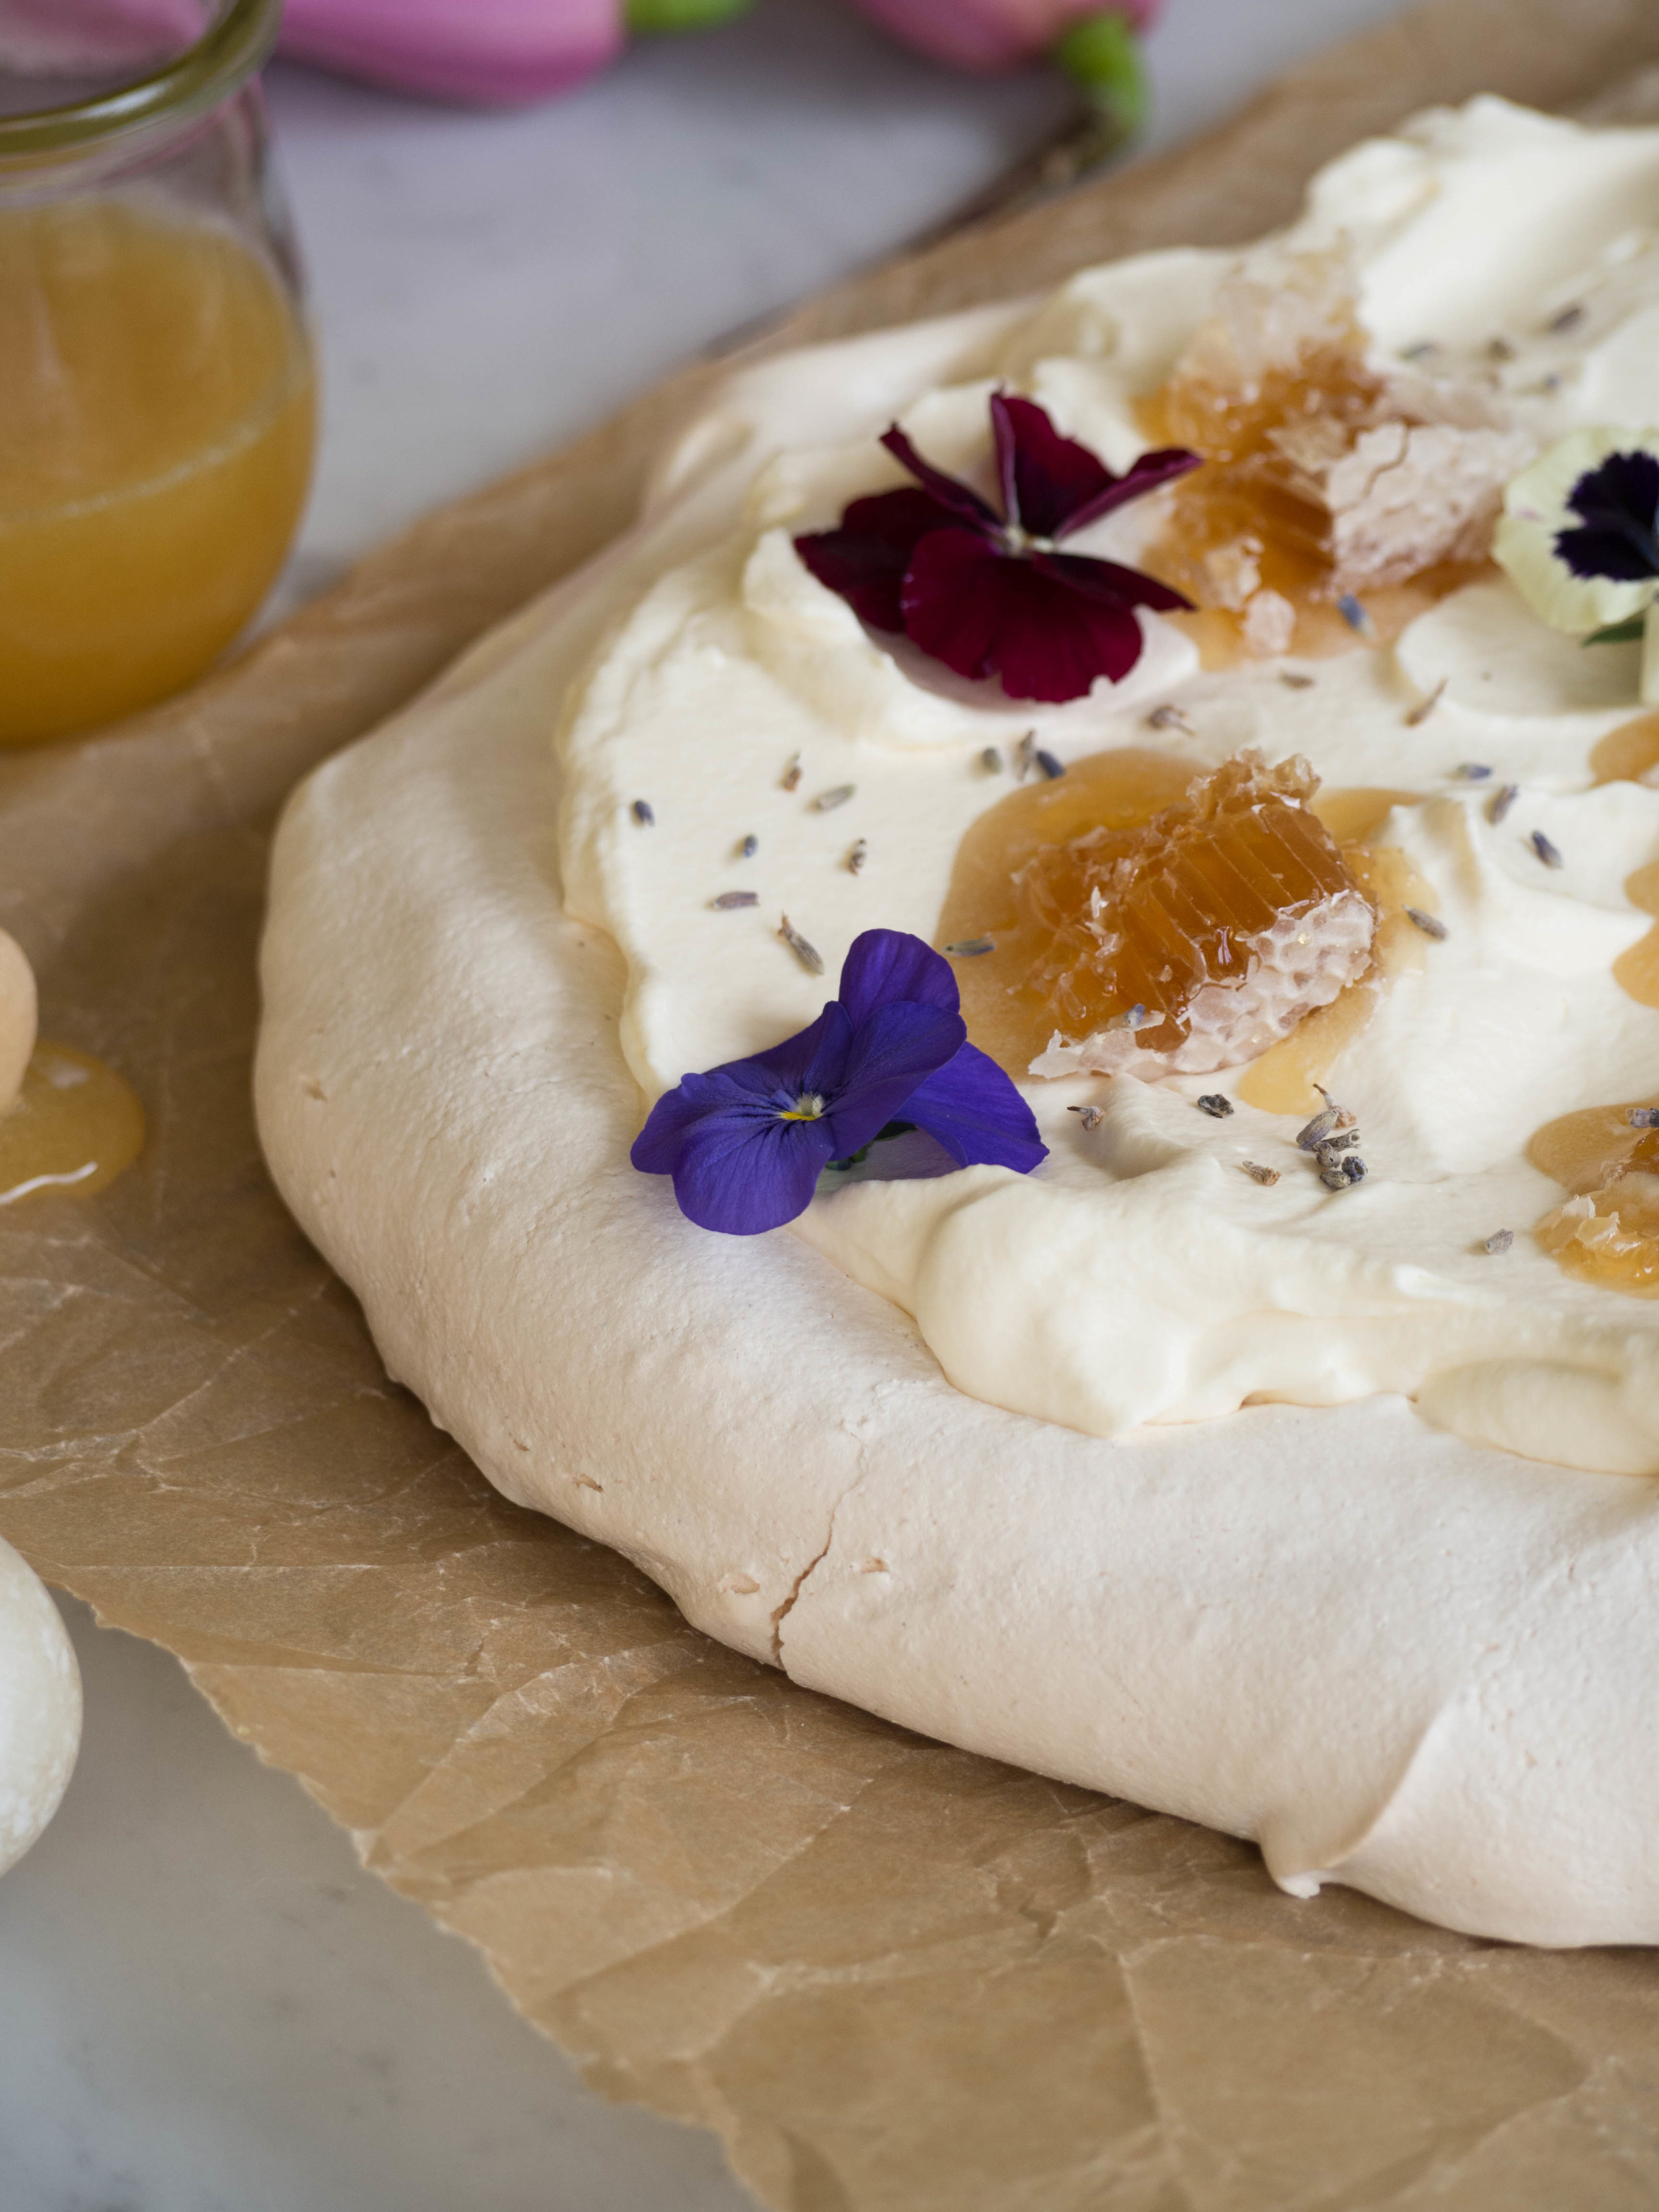
Just before you are ready to serve your pavlova, whip the cream until it has thickened and is forming soft peaks. Add the honey and whisk until combined. Spread the cream over the centre of the pavlova. Decorate with a small sprinkling of dried edible lavender, small chunks of fresh honeycomb and some edible flowers. 

Note: If you are preparing the pavlova in advance of serving it, or know you will have left overs, I suggest serving the honeycomb on the side as the honey from the honeycomb will start to drip away when stored in the fridge.

Duck Egg Pavlova with Fresh Honeycomb

Duck Egg Pavlova with Fresh Honeycomb

Duck Egg Pavlova with Fresh Honeycomb

Duck Egg Pavlova with Fresh Honeycomb

Duck Egg Pavlova with Fresh Honeycomb

Duck Egg Pavlova with Fresh Honeycomb

Duck Egg Pavlova with Fresh Honeycomb

Duck Egg Pavlova with Fresh Honeycomb

In Other Desserts Tags Duck Eggs, Pavlova, fresh honeycomb, Edible Flowers
Comment
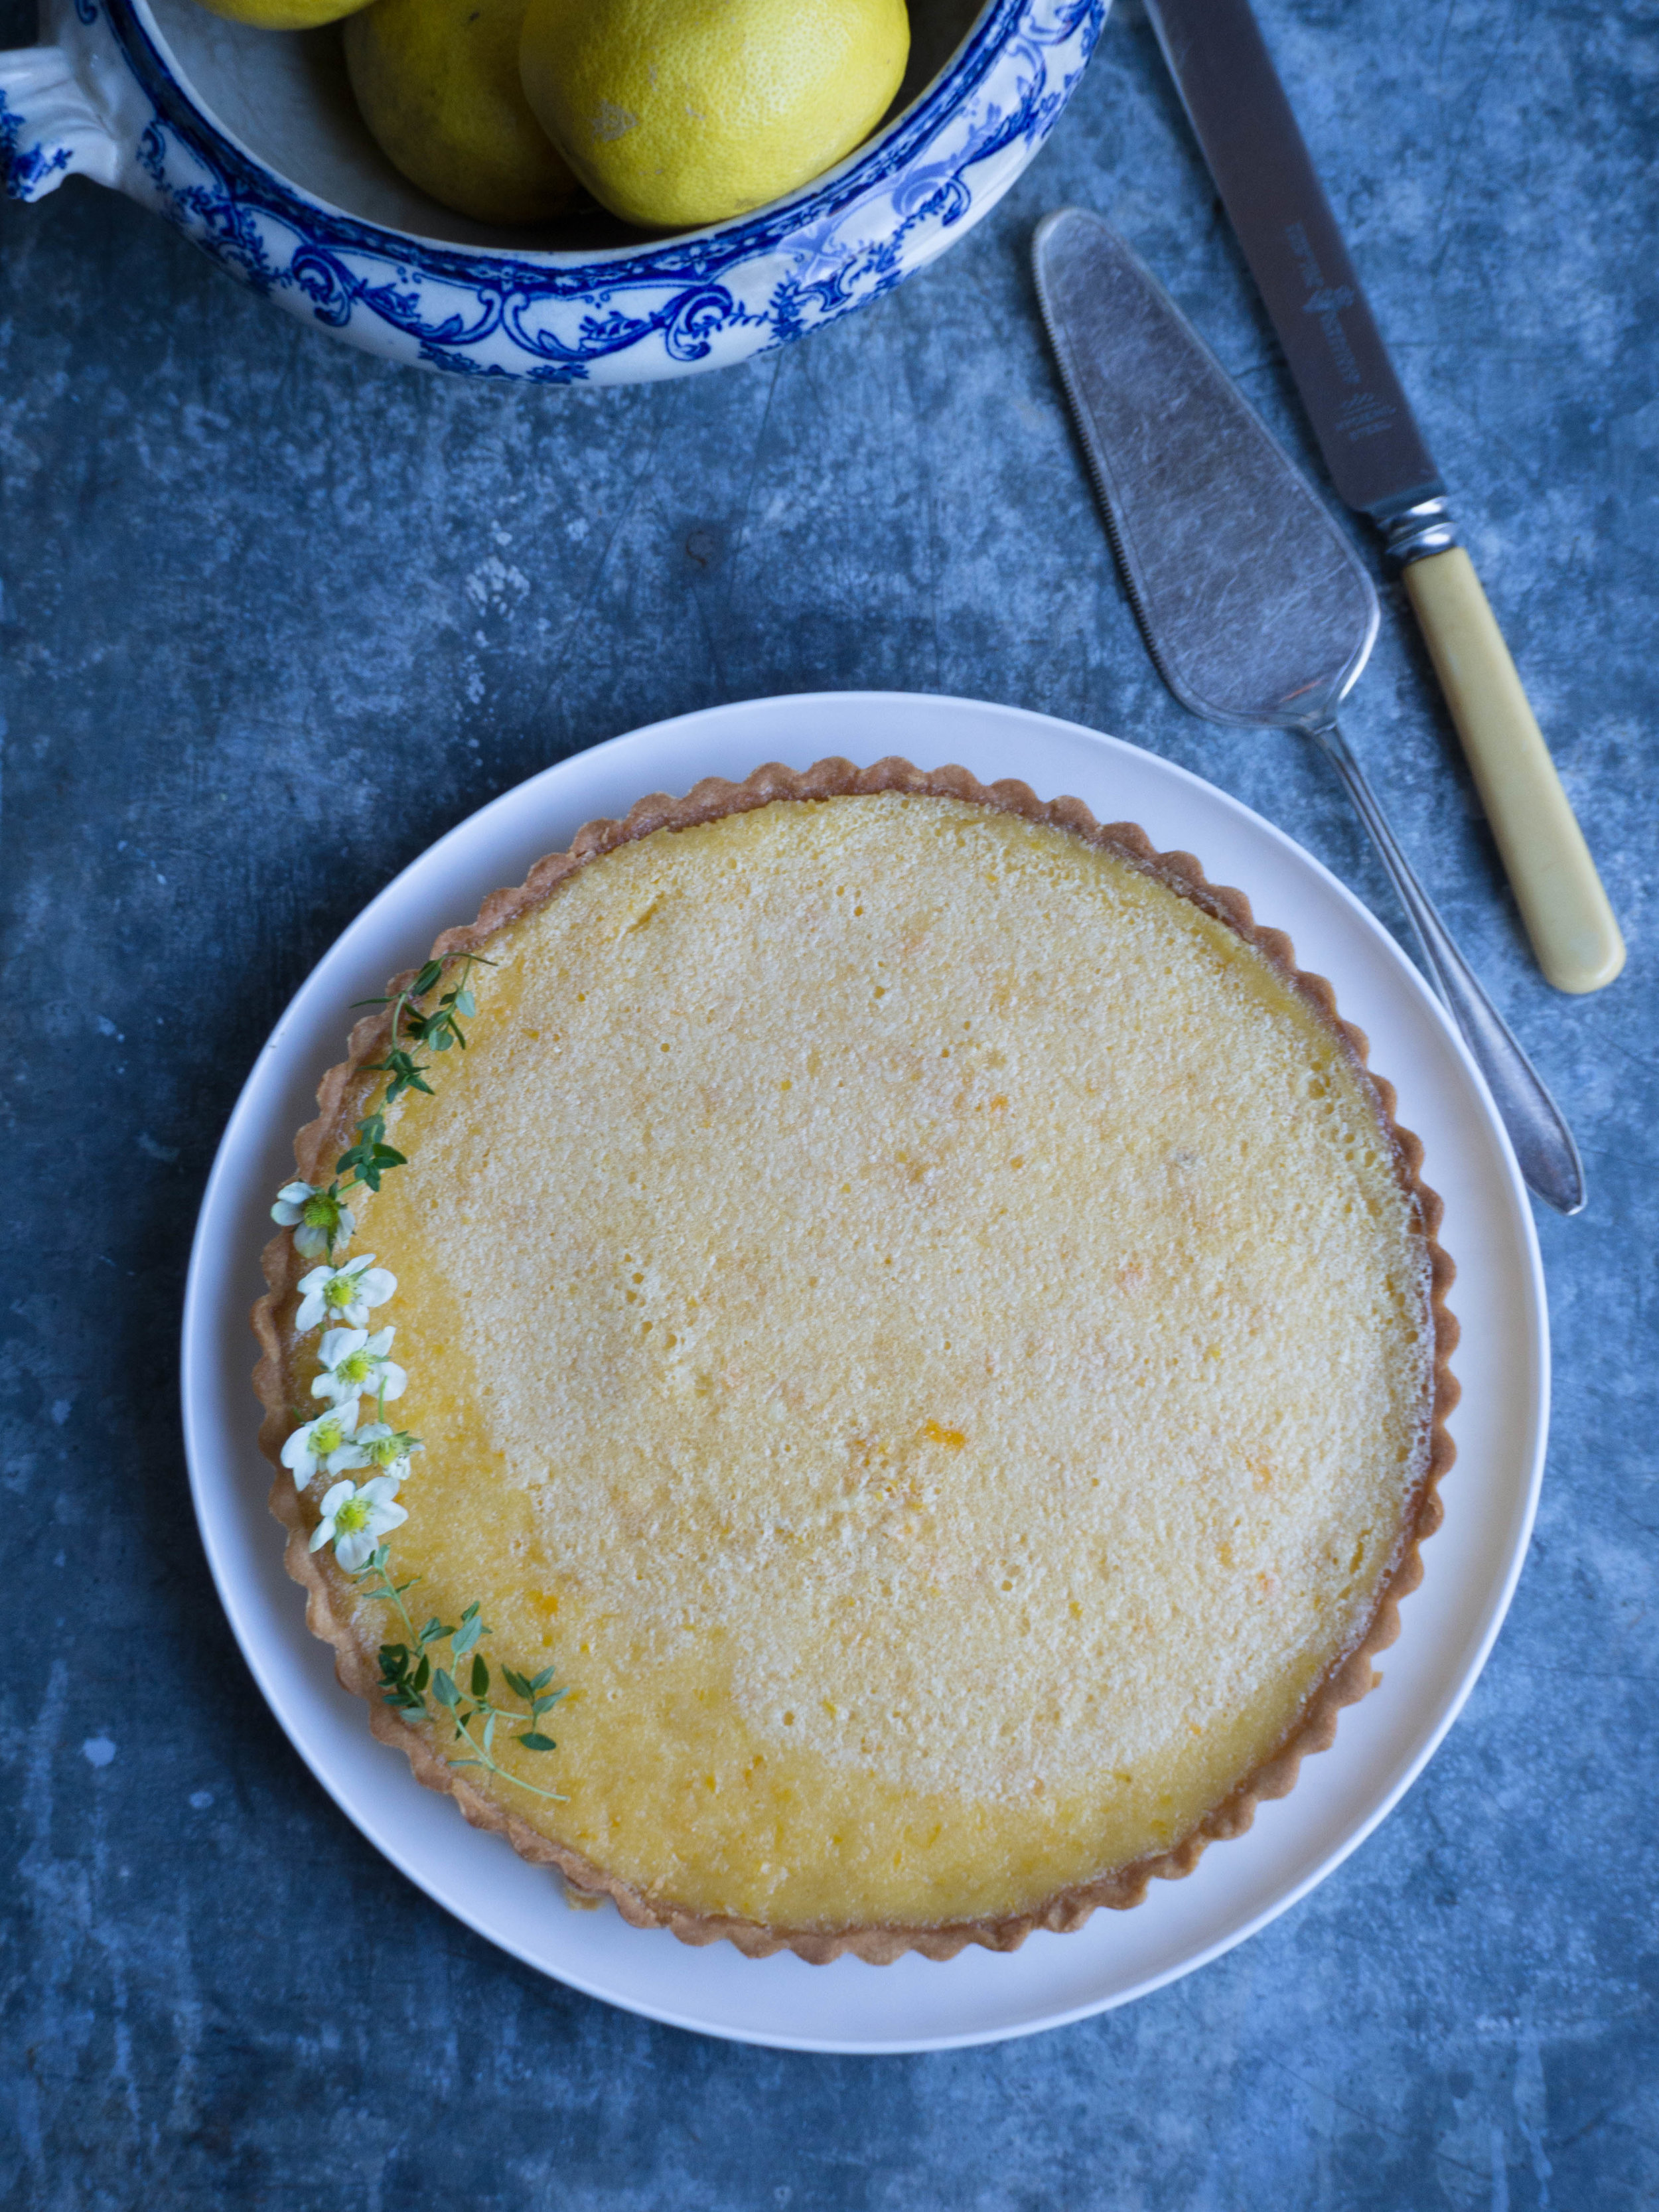
Citrus Tart

Citrus Tart

A Cirtus Tart & Surviving the 9-5

Kath August 31, 2017

I found this recipe in Catherine Phipps' book ‘Citrus’ and found the book, via the podcast ‘Stir the Pot’ by Edd Kimber. I have really taken to listening to podcasts in the past year, after my initial introduction to Cherry Bombe magazine’s ‘Radio Cherry Bombe’, my list of favourites has grown. At first these podcasts, were my way of doing something for myself on my commute to and from a job I really didn’t want to be doing anymore. My emotional health was suffering a lot because of this job, and having something that was just for me on a topic I am obsessed with made each working day a little easier. I had a little bit of a walk from the train station to my old work, and I will always remember the sense of dread I felt once I got closer to work. I would turn the corner and the knowledge that my time was up, until 5pm, would hit me. The following 7-8 hours were all about spending time in an often toxic environment, doing a job that was literally going nowhere.

The highlights of those work days mostly involved food. Apart from the podcasts, what I planned to eat at lunch, what ingredients I would buy on my lunch break or having a quiet lunch with other like minded colleagues were the moments that kept me going. I also stress purchased many a cookbook from the couple of bookstores in the area, which is where I found ‘Citrus’. I had listened to Edd Kimber’s interview with Catherine on his podcast, and had made a mental note to keep an eye out for Catherine’s book. During the interview they had discussed cooking with citrus, and to my delight, cooking with bergamots (see more on my bergamot obsession here). When I found a copy of the book, I instantly knew I had to buy it. I hadn’t been expecting to find it so easily, and being so unhappy in my job made my weakness for buying cookbooks all the more feeble. 

There are so many good recipes in ‘Citrus’, covering all types of food and occasions. This tart comes from the Desserts section, which also includes recipes for a Blood Orange and Rhubarb Meringue Pie, Bergamot and Rose Turkish Delight Pavlova (be still my heart) and a Earl Grey and Rose Parfait (was this book actually written just for me?!). I love Catherine’s flavour combinations, and the information on how to use particular and less common citrus. 

You don’t need a food processor for the pastry in this recipe, which I loved as we no longer have one (we weren’t using it so gave it away!). I used a selection of citrus for the filling, lemon, lemonades and bergamots. You could just use one type of citrus, it just depends what you feel like. However as a guide, the original recipe stipulates the zest of 2 lemons and the juice of 3 lemons for the filling - use this as a guide re the quantities of juice in particular as for example, a large orange will hold more juice than a lemon. 

Winter Citrus - Lemons, Bergamots & Lemonades

Winter Citrus - Lemons, Bergamots & Lemonades

Citrus by Catherine Phipps

Citrus by Catherine Phipps

Making the Pastry

Making the Pastry

Cooked Tart Shell & Making the Filling

Cooked Tart Shell & Making the Filling

Citrus Tart

Ingredients for the Pastry: 

200g plain flour

pinch of salt

125g unsalted butter, cold & cubed 

50g icing sugar

2 egg yolks 

Ingredients for the Filling:

6 eggs

300g caster sugar

250ml heavy cream

finely grated zest of 2 citrus (lemons, lemonades, bergamots etc) and the juice of three citrus (lemons, lemonades, bergamots, small/medium oranges etc)


Method: 

To make the pastry, put the flour and salt in a bowl, and rub in the butter until it looks like almond meal. Stir in the icing sugar, then add the egg yolks and mixing it all together with your hands. If the dough is too crumbly at this stage, add a small amount of ice cold water to help bring it together. Shape into a disc and wrap in plastic wrap, and leave to rest in the fridge for at least 30 minutes.

Once the dough has rested, preheat oven to 180 degrees Celsius and lightly flour a work surface. Roll out the pastry, dusting with extra flour if necessary. Roll it fairly thinly, however don’t go so thin that it will easily break when you are placing it into the tart tin. The pastry needs to have the circumference to line a 24cm tart tin (approx.). Gently place the pastry over the tart tin, and gently push it in to the sides of the tin, trimming the edges that hang over the sides. Keep some of the left over raw pastry for later in case you need to patch up your tart case after the blind baking process.

Put the raw pastry case in the freezer for 10 minutes, then prick the pastry all over with a fork. Crumple up a piece of baking paper, then place it over the tart and fill with pastry weights. Bake the tart for 15 minutes, then remove the pastry weights and the baking paper and bake again for about 5 minutes. At this stage you don’t want any of your tart shell to be raw. Leave the tart shell to cool while you make the filling, and turn down the oven to 150 degrees Celsius. 

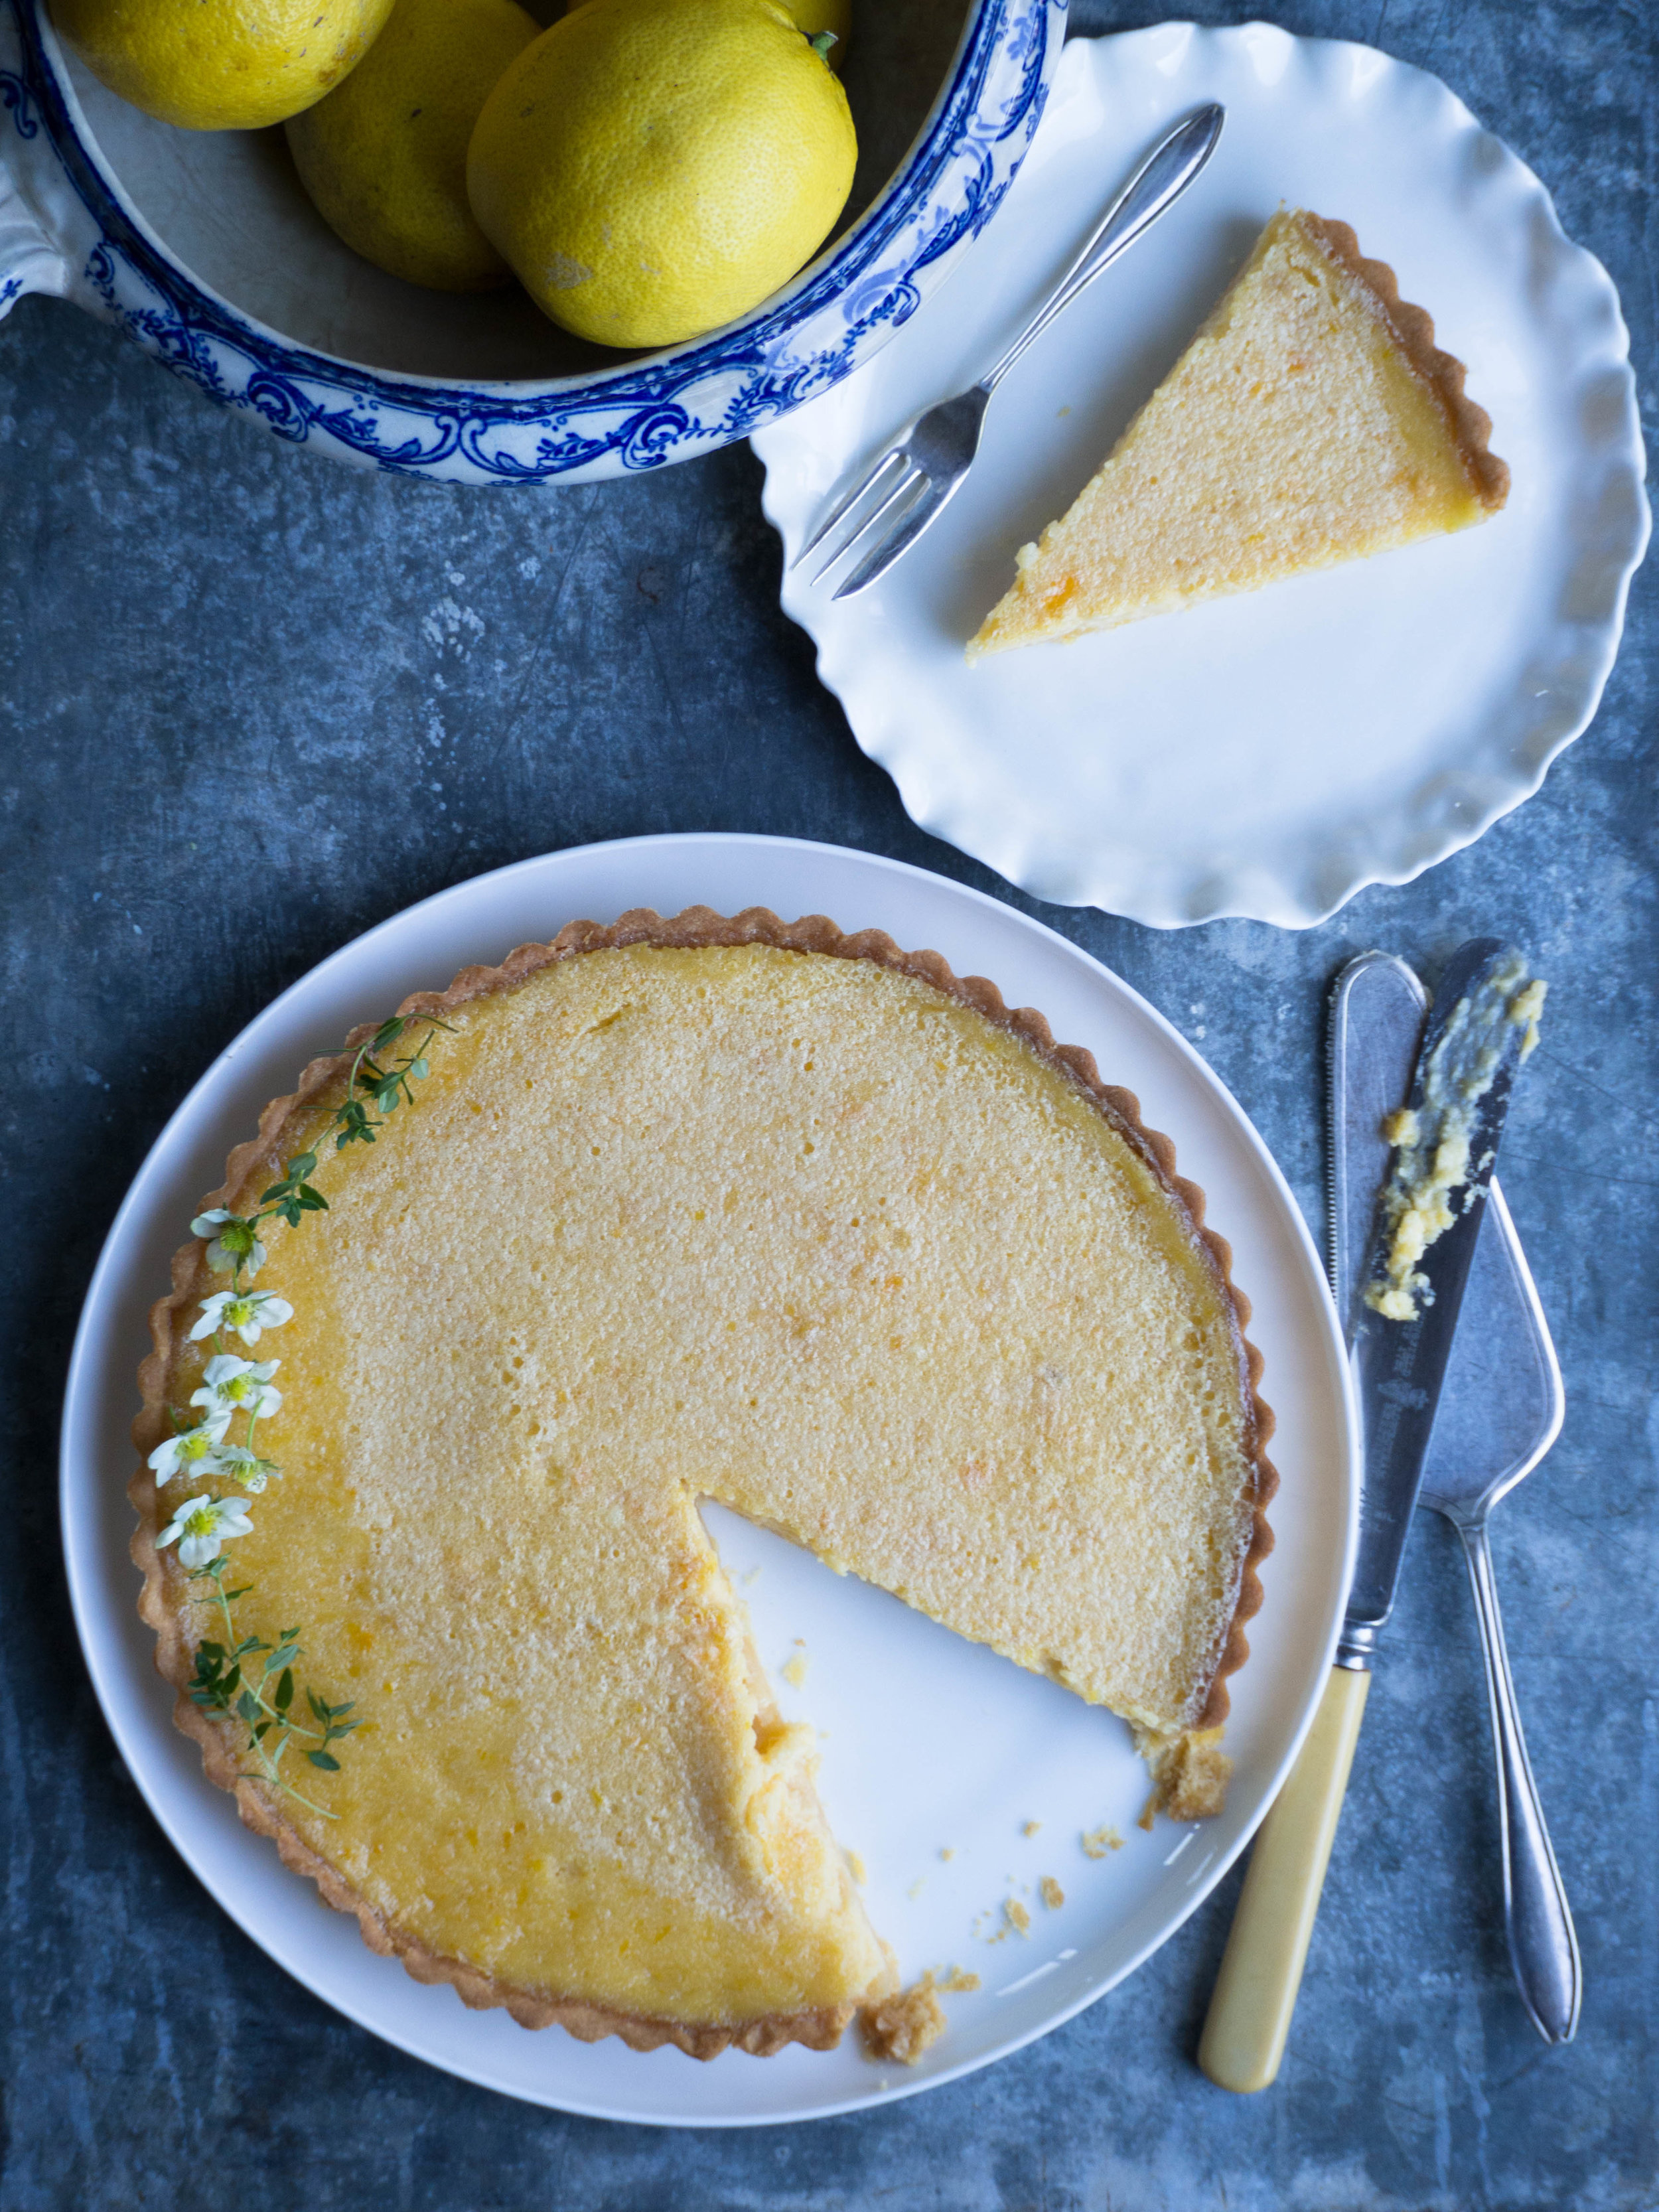
To make the filling whisk the eggs and caster sugar together until they are well combined, then whisk in the cream and citrus zest and juice. To fill the pastry case, place on a lined baking sheet and pull out one of the oven racks and place it on the rack. Gently pour the filling into the case from here (best to use a jug for this), then gently push the oven rack back in and bake for 30-40 minutes until the tart filling is just set (it will still wobble slightly). Leave the tart to cool before serving, and store in the fridge if there are leftovers! 

Citrus Tart

Citrus Tart

Reference: Citrus by Catherine Phipps (Quadrille, 2017), p.168. 

Citrus Tart

Citrus Tart

If you are struggling at work…

I would highly recommend one or more of these books/podcasts. While I am no longer working in the environment I mentioned in this post, I still find these resources immensely valuable.

  1. Not Just Lucky by Jamila Rizvi

  2. The Life Changing Magic of Not Giving a F**k by Sarah Knight

  3. The Subtle Art of Not Giving a F**k by Mark Manson

  4. What Color is Your Parachute? by Richard N. Bolles

  5. Little Black Book by Otegha Uwagba

  6. Thrive by Arianna Huffington

  7. Feminist Fight Club by Jessica Bennett

  8. Pursuit with Purpose Podcast with Melyssa Griffin

  9. One Girl Band Podcast with Lola Hoad

  10. The Mindful Kind Podcast with Rachael Kable

Winter Citrus

Winter Citrus

In Tarts & Pastry, Other Desserts Tags Tart, Citrus, Stir the Pot Podcast, Catherine Phipps
Comment
Ginger & Quince Cake with Quince Ice Cream

Ginger & Quince Cake with Quince Ice Cream

How to Bake with Quinces - Ginger & Quince Cake with Quince Ice Cream

Kath August 17, 2017

I seem to have a thing with ginger lately. Maybe it’s just that the warming nature of such spices go so well with Winter, or maybe I’m just a creature of habit. I haven’t always been this on board with ginger, I actually used to hate it. As a child the heat of it was too overpowering for me, and only very mild gingerbread biscuits would do. I remember the one time we all went overseas to the UK as a family, I was about 8 years old, and I become enamoured by Harrods - the lovely building, their constant use of teddy bears, all the food, and the fact they had a shop at the airport. When we were at Heathrow on our way home, I convinced Mum to buy a packet of Harrods Gingerbread as a snack for the plane. 

No doubt the packaging grabbed me, I’m sure it was cute enough to grab a child’s attention. Eating them on the plane, my mouth was on fire. They were so gingery, more than my underdeveloped taste buds could handle. I probably annoyed the air hostesses by asking for so many glasses of water, as I continued to eat the spicy gingerbread men despite the heat - probably as Mum had drilled into me how expensive they were (back then the Pound to Australian Dollar conversion was even worse than it is now), and to be honest as a picky eater I probably preferred them to the airplane food. 

Many years later, after making many a gingerbread man myself, I suddenly realised any aversion to ginger was long gone. I was walking back to the station from my internship, which conveniently meant walking past Bourke Street Bakery. I didn’t stop in very many times over the course of my internship, but the first time I did I decided to get one of their famous Ginger Brûlée Tarts. As I was close to finishing the tart, I realised I really couldn’t taste any ginger. The tart was nice, but thinking I still wasn’t a big ginger fan, I expected the flavour to hit me in the face. It was then I realised I must like ginger much more than I realised, and just kept thinking I didn’t as I hadn’t when I was younger. In fact, I liked it a lot, along with a few other things I hated as a child. 

So now I jump at any opportunity to cook with ground ginger in particular, and this cake is no exception. This cake paired with the quince ice cream is a seriously good way of celebrating the colder seasons (even though it seems to be warming up a little now!) and a good way of using up some poached quince if you have any (or have the inclination to make some). I can vouch for the fact that the ice cream is amazing on its own, so I would highly recommend making it even if you don’t need it as an accompaniment to a cake. 

What ingredients or foods did you hate as a child but like now? Let me know in the comments!

Ginger & Quince Cake with Quince Ice Cream

Ginger & Quince Cake with Quince Ice Cream

Ginger & Quince Cake with Quince Ice Cream

Ginger & Quince Cake with Quince Ice Cream

Ginger & Quince Cake with Quince Ice Cream

Ginger & Quince Cake with Quince Ice Cream

Quince Ice Cream

Ingredients: 

150g poached quince

50g poaching liquid

2 egg whites 

100g caster sugar 

1 tsp golden syrup 

salt

150g whipping cream 

1 tbsp Greek yoghurt 


Method: 

In a blender, puree poached quince with half the poaching liquid until it is smooth. Add the remaining poaching liquid and blend to combine. Set aside. 

Place a pot of water on the stove and heat until it is boiling. In a heatproof bowl, that is able to comfortably sit over the boiling pot of water, add the egg whites, sugar, golden syrup and a pinch of salt. Place the bowl over the boiling water and whisk continuously until the sugar dissolves and the mixture becomes frothy and opaque, or when the mixture reaches 75 degrees Celsius on a candy thermometer. Remove from the heat and transfer to the bowl of a stand mixer fitted with a whisk attachment. Whisk the warmed egg white mixture until it forms stiff peaks of meringue. 

In a separate bowl, whip the cream with the yoghurt until it forms soft peaks. Gently fold in the meringue, then the pureed quince. Pour into an ice cream machine and churn according to the manufacturers instructions. When ready, the ice cream should be softly frozen, thickened and clinging to the paddle of the machine. Transfer to a freezer safe container to freeze until ready to serve. 

Ginger & Quince Cake with Quince Ice Cream

Ginger & Quince Cake with Quince Ice Cream

Ginger & Quince Cake

Ingredients: 

250g self raising flour 

1 tsp ginger

1 tsp mixed spice

1/2 tsp cinnamon 

1 tsp baking powder

120g golden syrup

80g maple syrup 

2 tbsp poaching liquid from quinces

125 flavourless margarine or unsalted butter 

100g poached quince, diced (plus extra for serving, optional)

125 brown sugar 

2 eggs 

240ml milk 


Method: 

Pre-heat your oven to 180 degrees Celsius, then grease and line the base and sides of a 22cm (approx.) square cake tin. 

Sift the dry ingredients together into a large bowl.

In a small saucepan, add the quince, golden and maple syrups and the margarine/butter and warm over low heat so everything melts together. Add the quince and brown sugar and allow the mixture to simmer for a couple of minutes, stirring occasionally so it doesn’t stick to the bottom of the pan. 

In a small bowl, briefly mix the eggs and the milk together. Pour the syrup and butter mixture in to the dry ingredients, and mix well, ensuring there are no lumps of flour. Add the eggs and milk and mix to combine. 

Pour the batter into the prepared tin and bake for 30-35 minutes, or until a skewer comes out clean when inserted into the middle of the cake. Cool the cake in the tin for a few minutes before transferring to a cooling rack lined with baking paper (the cake will stick otherwise). 

Cut the cake into squares and serve warm or at room temperature with a scoop of quince ice cream and some extra poached quince. 

Ginger & Quince Cake with Quince Ice Cream

Ginger & Quince Cake with Quince Ice Cream

Ginger & Quince Cake with Quince Ice Cream

Ginger & Quince Cake with Quince Ice Cream

References: ‘The Violet Bakery Cookbook’ by Claire Ptak (Ten Speed Press, 2015), pp. 184-5; ‘Annie’s Farmhouse Kitchen’ by Annie Smithers (Hardie Grant Books, 2017), pp.52-3.

Ginger & Quince Cake with Quince Ice Cream

Ginger & Quince Cake with Quince Ice Cream

In Cakes & Slices, Other Desserts, Ice Cream Tags Quince, Ice Cream, Ginger, cake, Dessert
Comment

White Chocolate Ice Cream (Egg Free)

Kath May 1, 2017

I have been working on this recipe for a little while. It first came about because I got some of the Grounded Pleasures Real White Drinking Chocolate. And recently the lovely Sophie from Grounded Pleasures has gifted me some of their fantastic products, including their Real White Drinking Chocolate, so it was definitely time to revisit the recipe and try to perfect it before the cold weather really sets in and and making ice cream seems a little out of place. 

For some reason I was not content with just making Grounded Pleasures' Real White Drinking Chocolate into hot chocolate (although I highly recommend doing so, a really good white drinking chocolate like this one seemed so hard to come by until now!), I wanted to see if it worked in other things too. At the time I had been making ice cream a fair bit, and enjoying it immensely. So it felt only natural to make a white chocolate ice cream using the Grounded Pleasures Real White Drinking Chocolate. 

Since that first version I attempted, I have refined the recipe and am very happy with how it has turned out. The addition of finely chopped white chocolate (one that you would like to eat, not cooking chocolate) intensifies the white chocolate flavour and adds a little crunch to the ice cream. 

You will notice if you follow along with the blog, that I use the same basic ice cream recipe each time (see basic Vanilla Ice Cream and Panela Sugar and Vanilla Ice Cream). This is because it is so simple and easy, very quick to make, and I love the end result. I have never even bothered to try to make ice cream the traditional way yet, even though I have had an ice cream maker for well over a year now. I just can’t get past the simplicity of this method, yet how lovely the ice cream turns out. 

For a really creamy ice cream, use milk and cream that have higher fat contents, however skim milk and lighter creams work well and still produce a great end result. The first time I attempted making ice cream this way, I only had skim milk and a can of UHD light cream - it ended up being delicious ice cream, that also made me feel slightly less guilty when eating it!

Thank you so much again to Sophie of Grounded Pleasures for gifting me some of their wonderful products. These are truely products that I love baking with and would be doing so even if I hadn't received these generous gifts. 

White Chocolate Ice Cream

Ingredients: 

165ml full cream milk 

6 tbsp white sugar

250ml pouring cream 

1/4 cup Grounded Pleasures Real White Drinking Chocolate

1 tsp Grounded Pleasures Organic Vanilla extract

1 Grounded Pleasures Organic Vanilla bean, seeds scraped

100g white chocolate, finely chopped

fresh raspberries to serve, optional


Method: 

Whisk the milk and sugar together until the sugar has dissolved and the milk has become frothy. Then add the cream, the vanilla extract, the seeds of the vanilla bean, white hot chocolate powder and whisk until combined. 

Transfer mixture into the bowl of an ice cream machine, and process according to machine instructions. Once ready, mix through most of the chopped white chocolate. Transfer ice cream into a freezer safe container, sprinkle with the remaining white chocolate and freeze for at least 4 hours (overnight is best). 

Reference: ‘Lomelino’s Ice Cream’ by Linda Lomelino (Roost Books, 2015), p.13.

Thanks to Grounded Pleasures for sponsoring this post and providing the Real White Drinking Chocolate!

In Other Desserts, Ice Cream Tags Ice Cream, White Chocolate, Grounded Pleasures, Dessert, Sponsored Posts
2 Comments
  • The Blog
  • Older
  • Newer

recipes

  • Biscuits/Cookies 39
  • Breads Etc. 9
  • Breakfast 7
  • Cakes & Slices 68
  • Confectionary 5
  • Drinks 6
  • Events 14
  • Food Photography Tips 3
  • From The Mailing List 24
  • Heirloom Recipes 12
  • Holidays 44
  • Ice Cream 9
  • Jams Preserves & Spreads 9
  • Muffins 4
  • Off the Shelf 48
  • Other Desserts 25
  • Savoury Dishes/Meals 15
  • Scones 4
  • Tarts & Pastry 9
  • Travel 13

Sign up to Friday Food Chat with Kath, a weekly newsletter for more food, baking, cookbook chat and more!

Sign Up Here!
instagram-unauth pinterest facebook url

Website Accessibility: To enable text to speech function on the blog, click the sound button to the right of each blog post.

All images & content are the property of Kathryn Vincent, unless stated otherwise. Please do not use without permission.

Kulinary Adventures of Kath

Food Photography, Recipes & Baking

instagram-unauth pinterest facebook url