After 17 weeks, many frustrating meal times and far too many toasted sandwiches, our new kitchen is done! At the 17 week mark we were able to put most things back in the kitchen and use it (finally!), and after a few more weeks the last finishing touches and changes were done. Now all we need is another coat of paint and the longest kitchen renovation will be officially complete! I have been immensely enjoying being back in the kitchen. Not being able to bake for 4 months was almost like torture for me! Now I am trying to spend every spare moment in there, baking all the things I have been thinking about since late February, and making the most of seasonal produce I have been so desperately wanting to cook with.
Such seasonal produce, includes quince. Since finding some good poaching recipes last year, my enthusiasm for cooking (and eating) homemade poached quince has only increased. When June arrived, and our kitchen was still in renovation mode, I did begin to panic that I may miss quince season all together and have to wait another whole year to enjoy them. Luckily the renovation finished just in time and I have poached three lots of quince (on a new gas stove none the less!).

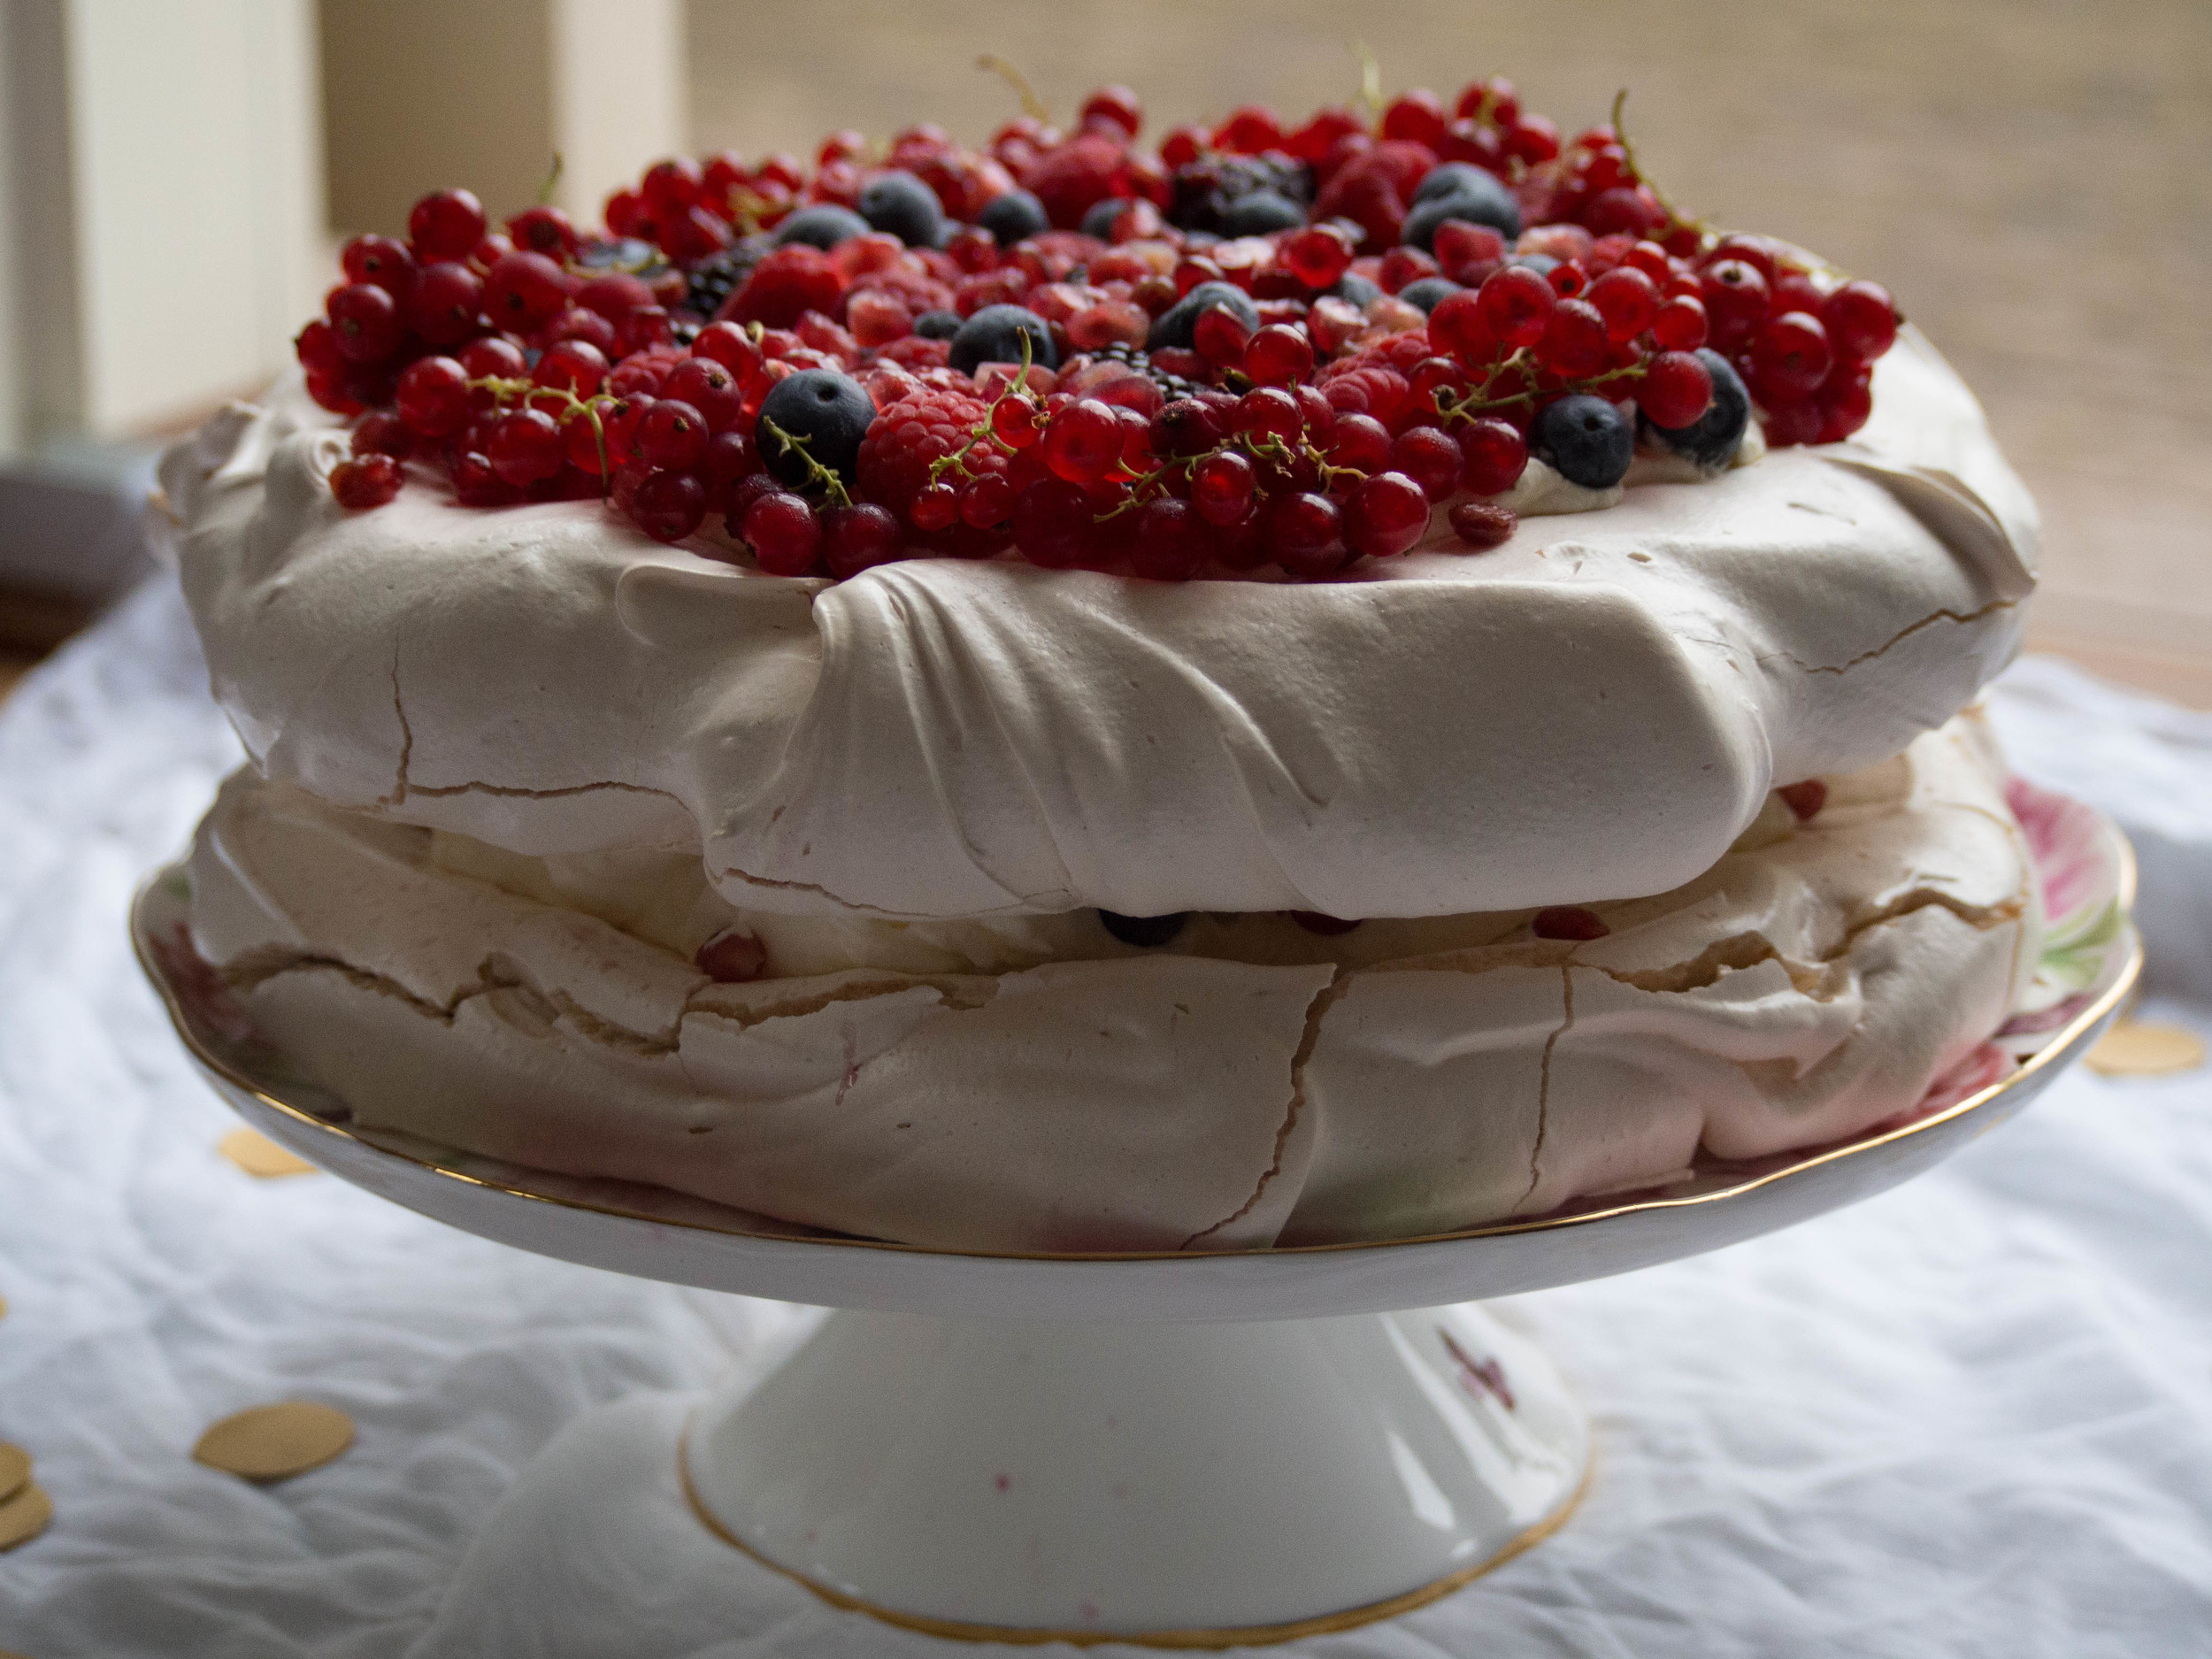
Grandma's Pavlova
I have some stored in the fridge, with extra poaching liquid to use for whatever takes my fancy. Though served with ice cream and a drizzle of poaching syrup makes a nice simple dessert, and topping pancakes with them turn lazy weekend breakfasts into thoroughly gourmet affairs.
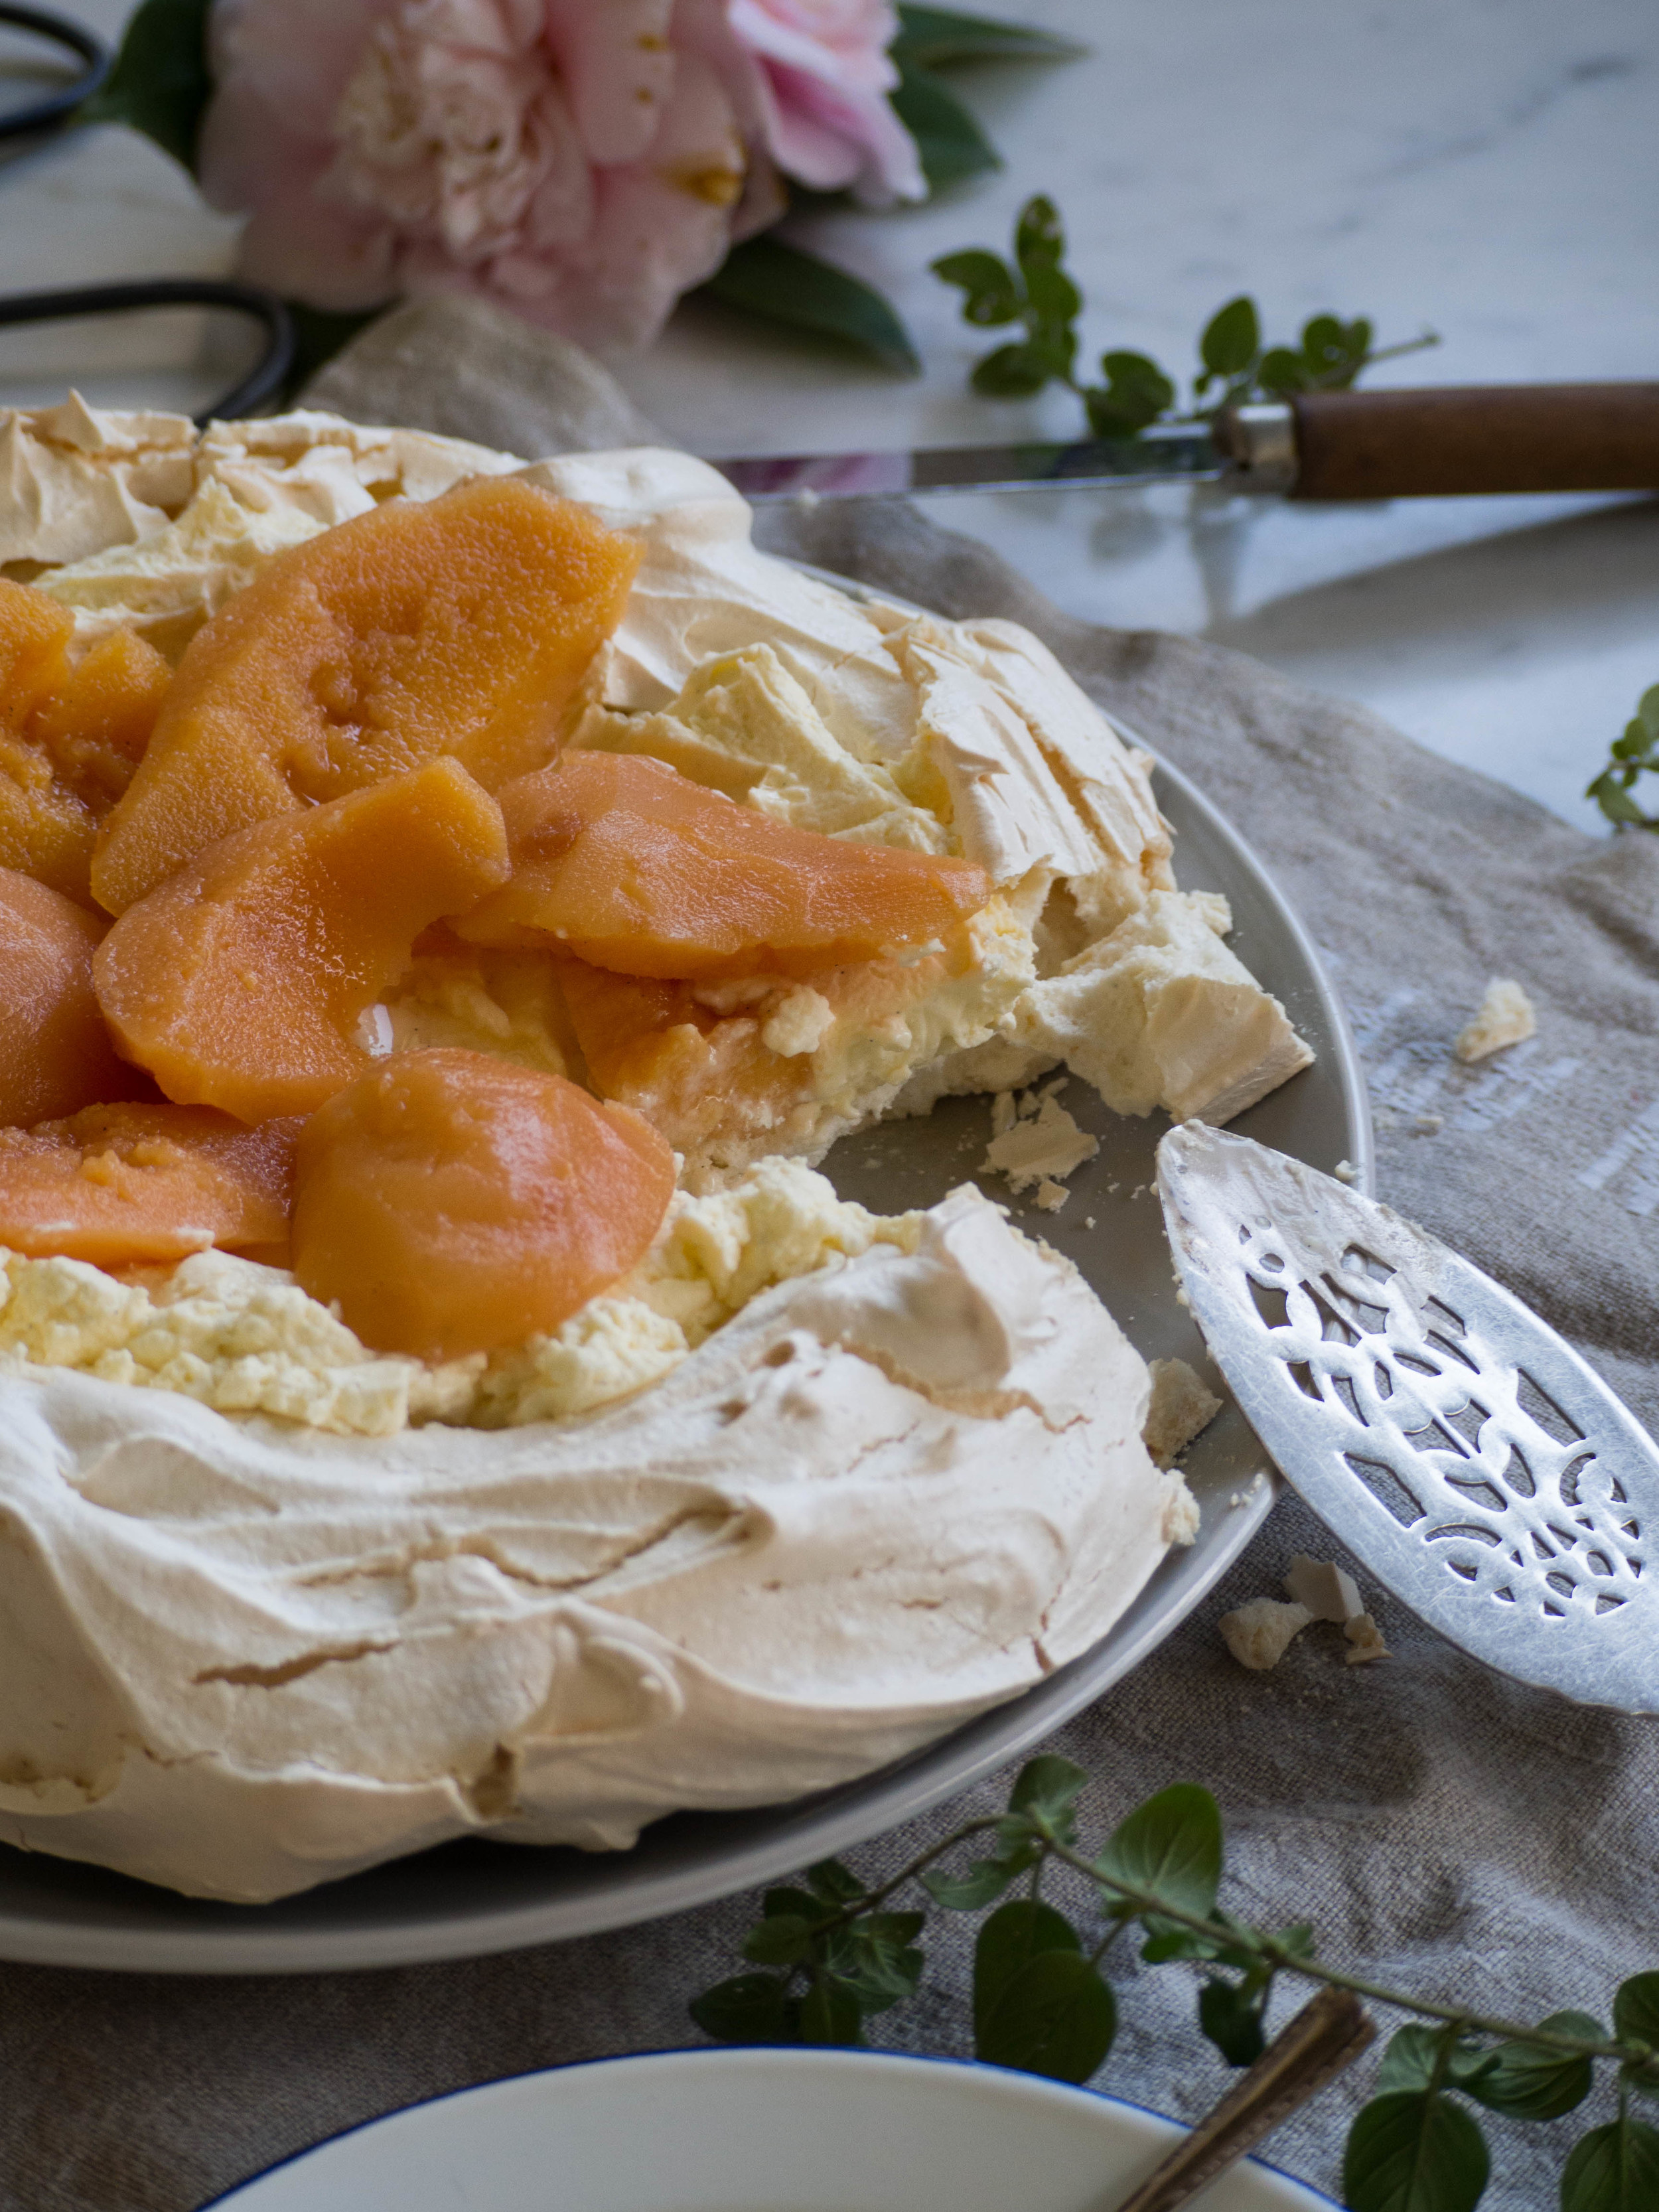
After the publication of Country Style’s Heirloom Recipe Cookbook, in which my Grandma’s pavlova recipe was featured, I decided to go back to this favourite family recipe and give it a Winter twist. I also was keen to see how a familiar recipe fared in our new oven! Every oven seems to be different and it takes a little while to adjust. I am finding I’m needing to turn the recommended temperatures down at least 10 degrees in our new oven, and for this recipe I ended up baking the pavlova at 110 degrees Celsius (after the initial pre-heating). I have left the oven temperature in the recipe the same as my Grandma’s original recipe, however if you can smell the pavlova cooking too quickly (it will start to smell like the beginning stages of caramel/burning sugar), turn the temperature down accordingly.
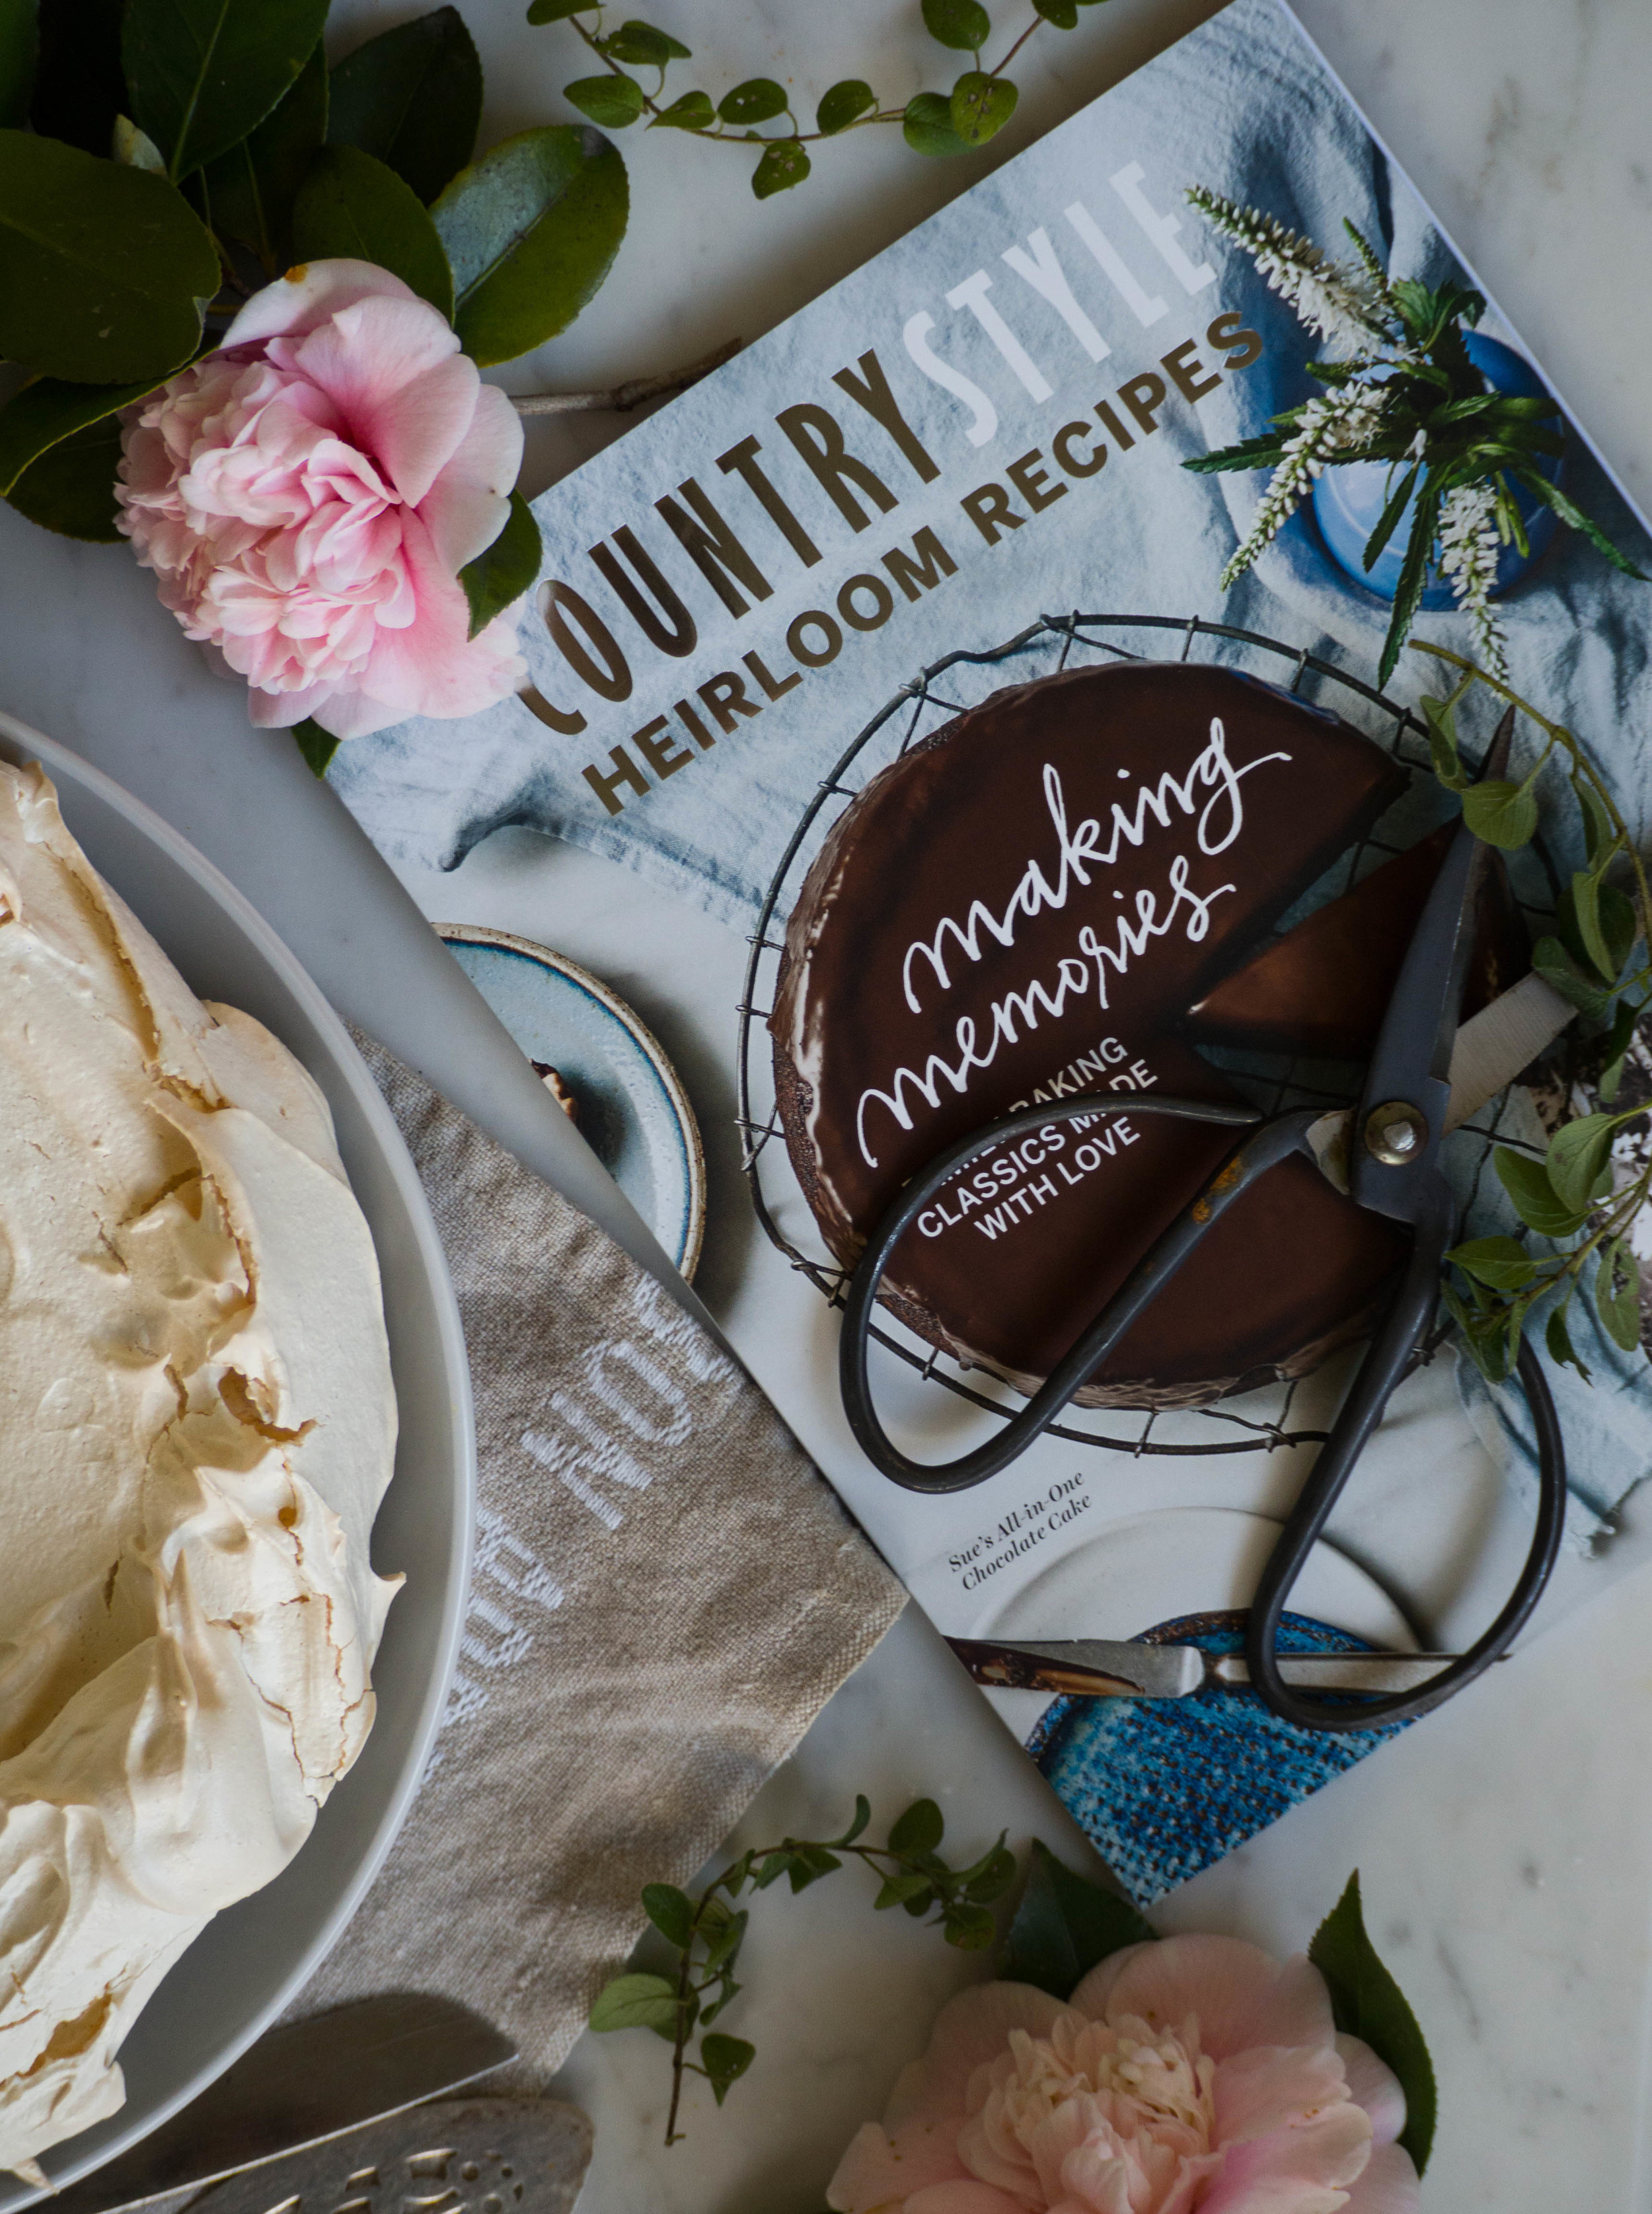
Country Style's Heirloom Recipes cookbook
Note: Both the poached quince and the pavlova base can be made in advance. The pavlova can be cooked the night before and left in the oven overnight to cool.

Poached Quince
Poached Quince
Ingredients:
6 Quince
900g white sugar
1.2L water
1 tsp vanilla bean paste
2 cinnamon quills
Method:
Peel the quince and cut into quarters, removing the cores. Wrap the peel and cores in muslin. In a large pot place the quince and the muslin containing the cores and peel. Add the sugar and water, and cook covered over low heat, allowing the water to simmer, for 1 hour.
After one hour check the quince by pricking a couple with a fork to check how tender they have become. The quince should become quite tender and soft, however remain whole and not break up. If the quince are not tender enough keep them on the heat, checking again after twenty minutes or so. This process should take between 1-2 hours total.
Once the quince have become tender, add the vanilla bean paste and cinnamon quills to the pot. Gently stir everything together, then turn off the heat and leave to cool with the lid on.
Once the quince have begun to cool, sterilise a couple of medium/large jars, by washing them in hot soapy water then placing in the oven for 20 minutes on a low temperature. Transfer the quince into each jar, then cover with as much poaching liquid as will fit. You may want an additional jar to store any remaining poaching liquid. Store in the fridge for up to a month.

Mascarpone Cream
Winter Pavlova
Ingredients:
4 egg whites
125g caster sugar
125g golden caster sugar
1 tsp white vinegar
1 tsp vanilla bean paste
20g cornflour
To decorate:
200g mascarpone (I used Pepe Saya)
150ml thickened cream
1 tsp vanilla extract
35g icing sugar
8 quarters of poached quince, approx.
Poaching liquid, to serve
Method:
Pre-heat oven to 200 degrees Celsius. Line a large baking tray with baking paper, and trace a circle approx. 26 cm in diameter (I used a dinner plate).
In a clean dry bowl, beat the egg whites for 5-6 minutes, whilst gradually adding the sugar. Add the vinegar and vanilla and beat until the mixture is stiff and glossy.
Sift cornflour over the mixture, and gently fold to combine.
Place mixture onto the tray in the middle of the drawn circle. Push the mixture around to form a circle, leaving a small border around the edges. Try to keep the edges a little higher than the middle so any filling can sit comfortably in the middle later.
Turn the oven down to 125 degrees Celsius, and cook undisturbed for 1.5 hours.
After 1.5 hours, turn the oven off and leave the pavlova to cool completely in the oven (or overnight).
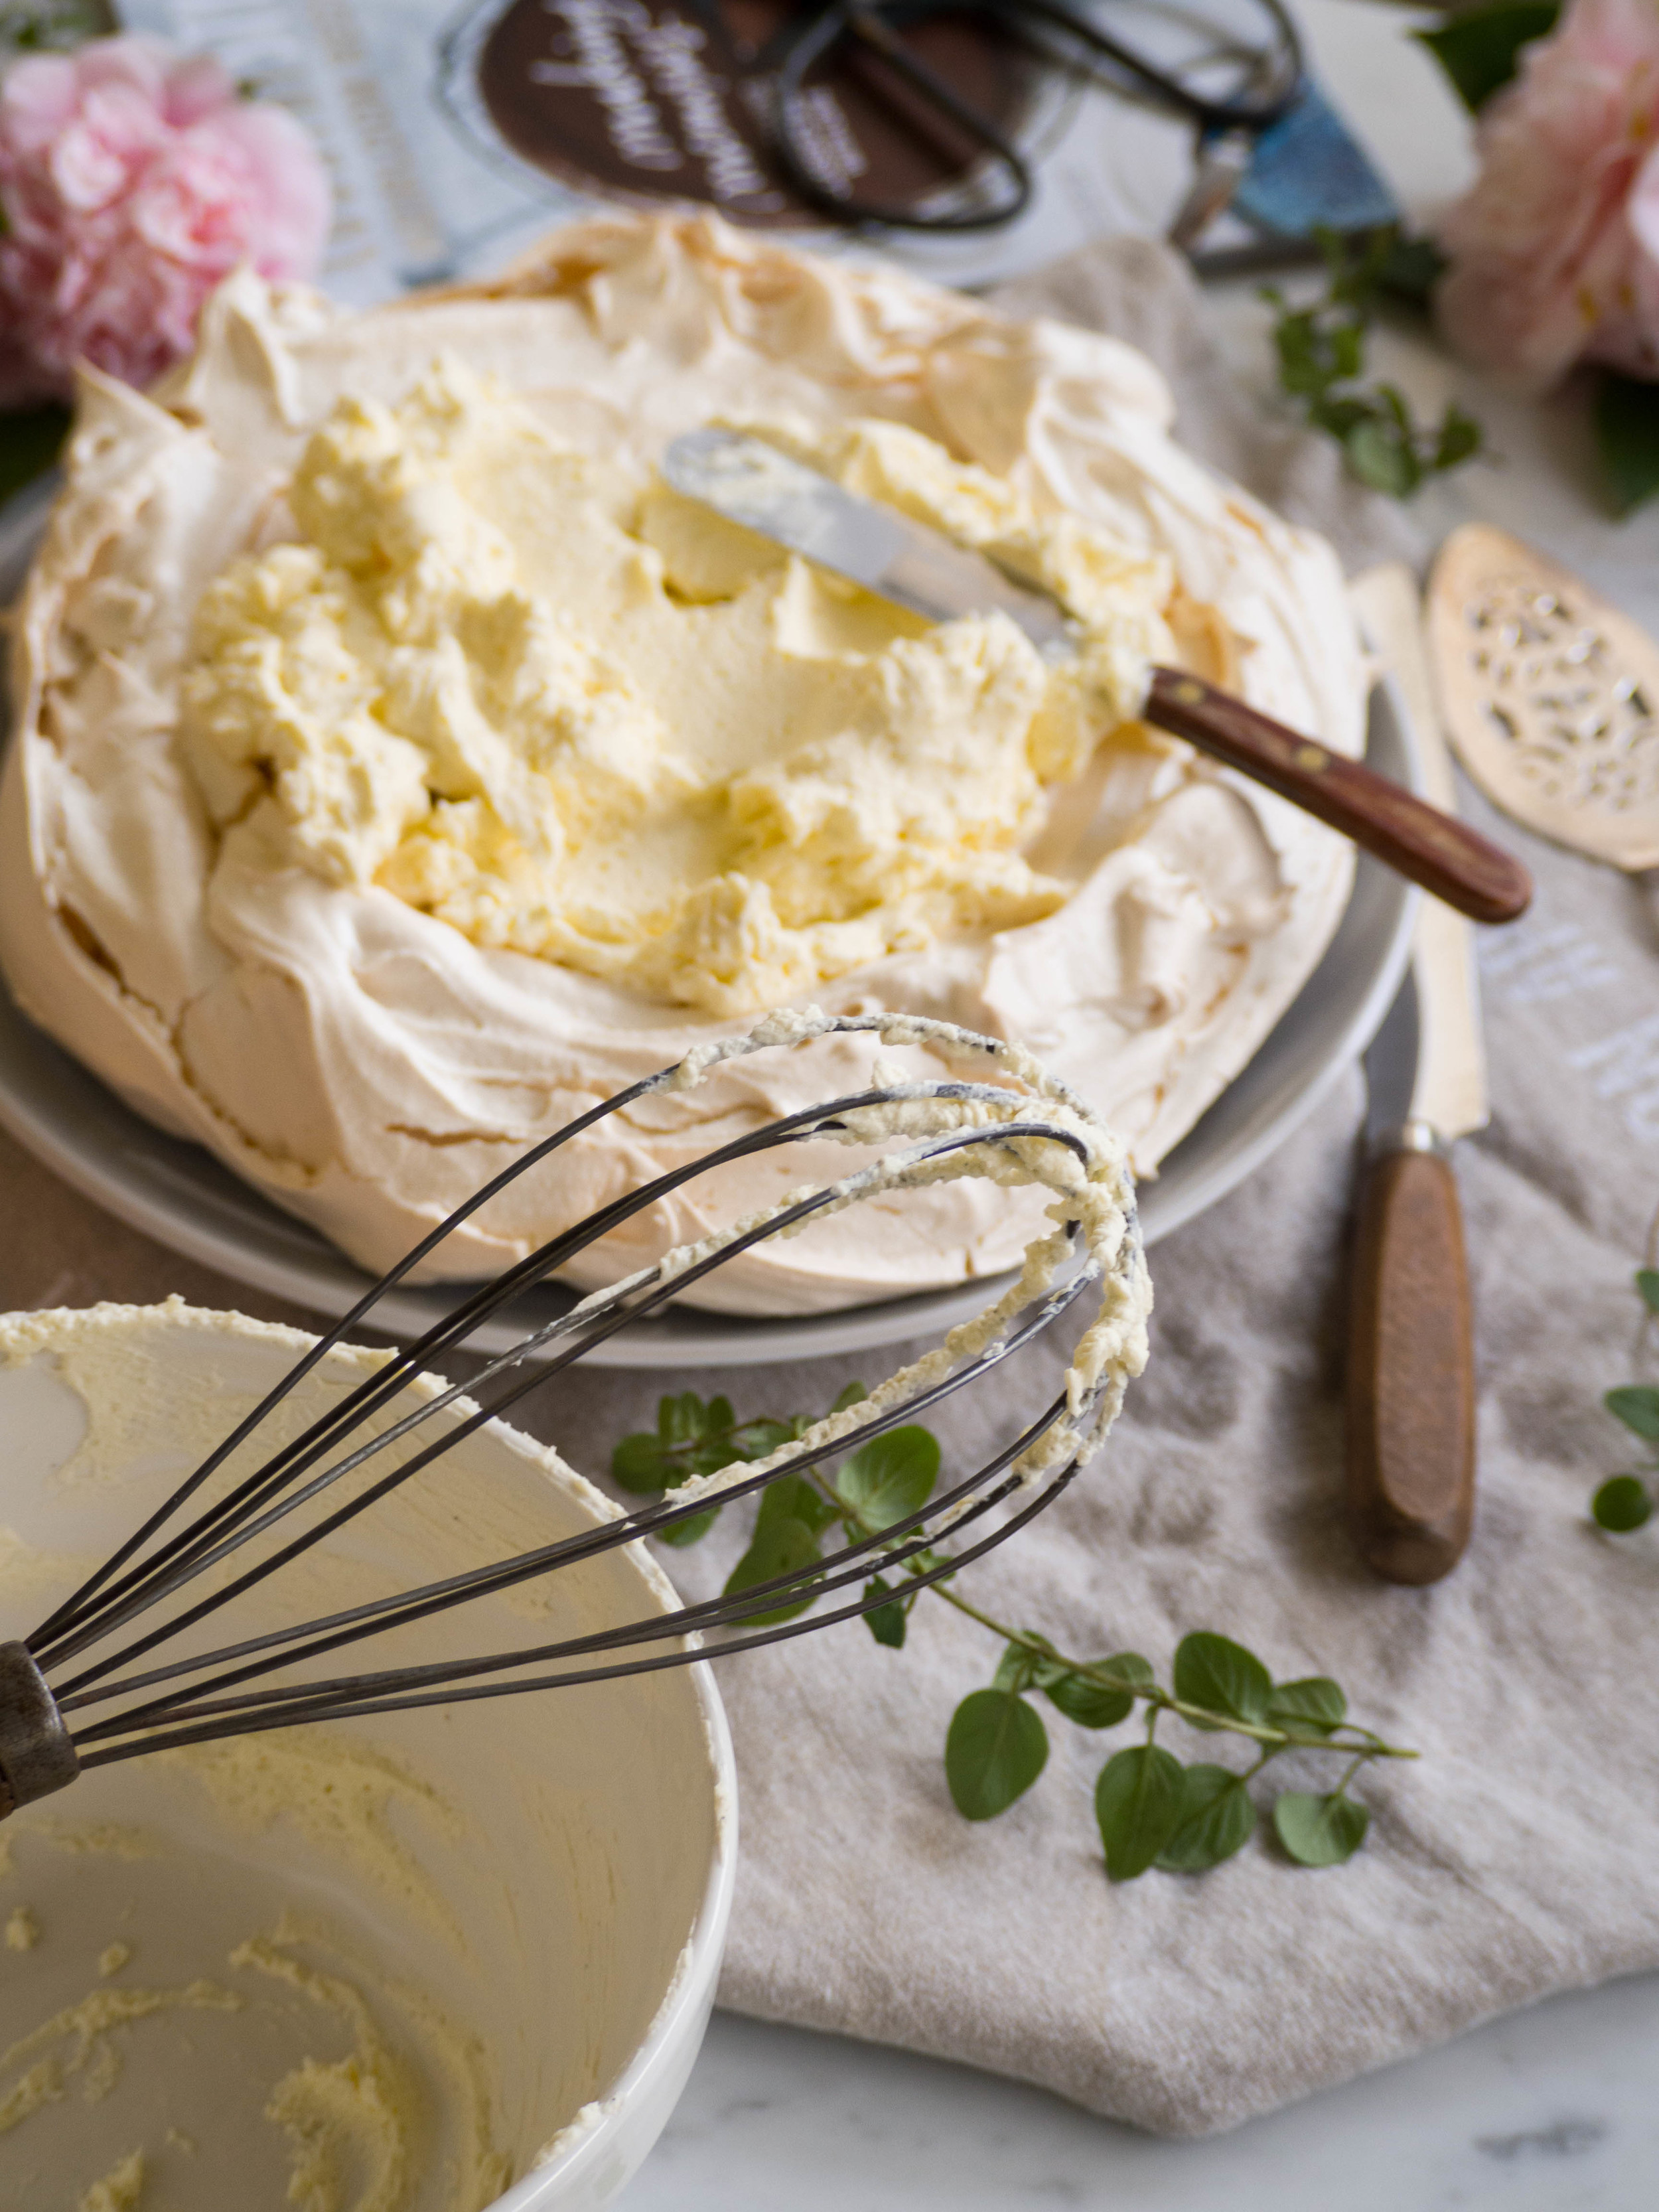
Just before you are ready to serve the pavlova, place the mascarpone in a medium sized bowl and whip until it has thickened and soft peaks form. Gradually add the cream, vanilla and icing sugar until all ingredients have combined and stiff peaks form.
Spread the mascarpone cream into the centre of the pavlova. Drain the quince of syrup and sit them on top of the cream.
Serve with the quince poaching liquid.

Winter Pavlova with Poached Quince

Reference: Jamie Magazine, Issue 63 November 2015 p.31.